
Sharpening Angles Determined & Maintained with a Coin Stack
One of the easiest ways to determine your blades current bevel angle (last sharpening angle) or sharpen to a specific angle is with a coin stack.
Below you will find our:
1.) Sharpening Angle to Coin Stack Table
2.) Items you will need
3.) Instructions to determine your blades current bevel angle and
4.) Instructions to sharpen to a specific angle.
Sharpening Angle to Coin Stack Table
| Sharpening Angle (dps) → |
10° | 12.5° | 15° | 17.5° | 20° | 22.5° | 25° | 27.5° | 30° |
| Blade Height ↓ | Number of U.S. Pennies | ||||||||
| 5 mm | 0.6 | 0.7 | 0.9 | 1.0 | 1.2 | 1.3 | 1.5 | 1.6 | 1.7 |
| 6 mm | 0.7 | 0.9 | 1.1 | 1.2 | 1.4 | 1.6 | 1.7 | 1.9 | 2.1 |
| 1/4" | 0.8 | 0.9 | 1.1 | 1.3 | 1.5 | 1.7 | 1.9 | 2.0 | 2.2 |
| 7 mm | 0.8 | 1.0 | 1.2 | 1.5 | 1.7 | 1.8 | 2.0 | 2.2 | 2.4 |
| 5/16" | 1.0 | 1.2 | 1.4 | 1.6 | 1.9 | 2.1 | 2.3 | 2.5 | 2.7 |
| 8 mm | 1.0 | 1.2 | 1.4 | 1.7 | 1.9 | 2.1 | 2.3 | 2.5 | 2.8 |
| 9 mm | 1.1 | 1.3 | 1.6 | 1.9 | 2.1 | 2.4 | 2.6 | 2.9 | 3.1 |
| 3/8" | 1.1 | 1.4 | 1.7 | 2.0 | 2.2 | 2.5 | 2.8 | 3.0 | 3.3 |
| 10 mm | 1.2 | 1.5 | 1.8 | 2.1 | 2.4 | 2.6 | 2.9 | 3.2 | 3.4 |
| 11 mm | 1.3 | 1.6 | 2.0 | 2.3 | 2.6 | 2.9 | 3.2 | 3.5 | 3.8 |
| 7/16" | 1.3 | 1.7 | 2.0 | 2.3 | 2.6 | 2.9 | 3.2 | 3.5 | 3.8 |
| 12 mm | 1.4 | 1.8 | 2.1 | 2.5 | 2.8 | 3.2 | 3.5 | 3.8 | 4.1 |
| 1/2" | 1.5 | 1.9 | 2.3 | 2.6 | 3.0 | 3.4 | 3.7 | 4.0 | 4.4 |
| 13 mm | 1.6 | 1.9 | 2.3 | 2.7 | 3.1 | 3.4 | 3.8 | 4.1 | 4.5 |
| 14 mm | 1.7 | 2.1 | 2.5 | 2.9 | 3.3 | 3.7 | 4.1 | 4.5 | 4.8 |
| 9/16" | 1.7 | 2.1 | 2.6 | 3.0 | 3.4 | 3.8 | 4.2 | 4.5 | 4.9 |
| 15 mm | 1.8 | 2.2 | 2.7 | 3.1 | 3.5 | 4.0 | 4.4 | 4.8 | 5.2 |
| 5/8" | 1.9 | 2.4 | 2.8 | 3.3 | 3.7 | 4.2 | 4.6 | 5.1 | 5.5 |
| 16 mm | 1.9 | 2.4 | 2.9 | 3.3 | 3.8 | 4.2 | 4.7 | 5.1 | 5.5 |
| 17 mm | 2.0 | 2.5 | 3.0 | 3.5 | 4.0 | 4.5 | 5.0 | 5.4 | 5.9 |
| 11/16" | 2.1 | 2.6 | 3.1 | 3.6 | 4.1 | 4.6 | 5.1 | 5.6 | 6.0 |
| 18 mm | 2.2 | 2.7 | 3.2 | 3.7 | 4.2 | 4.8 | 5.2 | 5.7 | 6.2 |
| 19 mm | 2.3 | 2.8 | 3.4 | 3.9 | 4.5 | 5.0 | 5.5 | 6.1 | 6.6 |
| 3/4" | 2.3 | 2.8 | 3.4 | 4.0 | 4.5 | 5.0 | 5.6 | 6.1 | 6.6 |
| 20 mm | 2.4 | 3.0 | 3.6 | 4.1 | 4.7 | 5.3 | 5.8 | 6.4 | 6.9 |
| 13/16" | 2.5 | 3.1 | 3.7 | 4.3 | 4.9 | 5.4 | 6.0 | 6.6 | 7.1 |
| 21 mm | 2.5 | 3.1 | 3.7 | 4.4 | 5.0 | 5.5 | 6.1 | 6.7 | 7.2 |
| 22 mm | 2.6 | 3.3 | 3.9 | 4.6 | 5.2 | 5.8 | 6.4 | 7.0 | 7.6 |
| 7/8" | 2.7 | 3.3 | 4.0 | 4.6 | 5.2 | 5.9 | 6.5 | 7.1 | 7.7 |
| 23 mm | 2.8 | 3.4 | 4.1 | 4.8 | 5.4 | 6.1 | 6.7 | 7.3 | 7.9 |
| 15/16" | 2.9 | 3.6 | 4.3 | 4.9 | 5.6 | 6.3 | 6.9 | 7.6 | 8.2 |
| 24 mm | 2.9 | 3.6 | 4.3 | 5.0 | 5.7 | 6.3 | 7.0 | 7.6 | 8.3 |
| 25 mm | 3.0 | 3.7 | 4.5 | 5.2 | 5.9 | 6.6 | 7.3 | 8.0 | 8.6 |
| 1" | 3.0 | 3.8 | 4.5 | 5.3 | 6.0 | 6.7 | 7.4 | 8.1 | 8.8 |
| 26 mm | 3.1 | 3.9 | 4.6 | 5.4 | 6.1 | 6.9 | 7.6 | 8.3 | 9.0 |
| 1+1/16" | 3.2 | 4.0 | 4.8 | 5.6 | 6.4 | 7.1 | 7.9 | 8.6 | 9.3 |
| 27 mm | 3.2 | 4.0 | 4.8 | 5.6 | 6.4 | 7.1 | 7.9 | 8.6 | 9.3 |
| 28 mm | 3.4 | 4.2 | 5.0 | 5.8 | 6.6 | 7.4 | 8.2 | 8.9 | 9.7 |
| 1+1/8" | 3.4 | 4.3 | 5.1 | 5.9 | 6.7 | 7.5 | 8.3 | 9.1 | 9.9 |
| 29 mm | 3.5 | 4.3 | 5.2 | 6.0 | 6.8 | 7.7 | 8.5 | 9.2 | 10.0 |
| 30 mm | 3.6 | 4.5 | 5.4 | 6.2 | 7.1 | 7.9 | 8.7 | 9.6 | 10.3 |
| 1+3/16" | 3.6 | 4.5 | 5.4 | 6.3 | 7.1 | 8.0 | 8.8 | 9.6 | 10.4 |
| 31 mm | 3.7 | 4.6 | 5.5 | 6.4 | 7.3 | 8.2 | 9.0 | 9.9 | 10.7 |
| 1+1/4" | 3.8 | 4.7 | 5.7 | 6.6 | 7.5 | 8.4 | 9.3 | 10.1 | 10.9 |
| 32 mm | 3.8 | 4.8 | 5.7 | 6.6 | 7.5 | 8.4 | 9.3 | 10.2 | 11.0 |
| 33 mm | 4.0 | 4.9 | 5.9 | 6.8 | 7.8 | 8.7 | 9.6 | 10.5 | 11.4 |
| 1+5/16" | 4.0 | 5.0 | 6.0 | 6.9 | 7.9 | 8.8 | 9.7 | 10.6 | 11.5 |
| 34 mm | 4.1 | 5.1 | 6.1 | 7.1 | 8.0 | 9.0 | 9.9 | 10.8 | 11.7 |
| 1+3/8" | 4.2 | 5.2 | 6.2 | 7.2 | 8.2 | 9.2 | 10.2 | 11.1 | 12.0 |
| 35 mm | 4.2 | 5.2 | 6.2 | 7.3 | 8.3 | 9.2 | 10.2 | 11.1 | 12.1 |
| 36 mm | 4.3 | 5.4 | 6.4 | 7.5 | 8.5 | 9.5 | 10.5 | 11.5 | 12.4 |
| 1+7/16" | 4.4 | 5.5 | 6.5 | 7.6 | 8.6 | 9.6 | 10.6 | 11.6 | 12.6 |
| 37 mm | 4.4 | 5.5 | 6.6 | 7.7 | 8.7 | 9.8 | 10.8 | 11.8 | 12.8 |
| 38 mm | 4.6 | 5.7 | 6.8 | 7.9 | 9.0 | 10.0 | 11.1 | 12.1 | 13.1 |
| 1+1/2" | 4.6 | 5.7 | 6.8 | 7.9 | 9.0 | 10.1 | 11.1 | 12.1 | 13.1 |
| 39 mm | 4.7 | 5.8 | 7.0 | 8.1 | 9.2 | 10.3 | 11.4 | 12.4 | 13.4 |
| 1+9/16" | 4.8 | 5.9 | 7.1 | 8.2 | 9.4 | 10.5 | 11.6 | 12.6 | 13.7 |
| 40 mm | 4.8 | 6.0 | 7.1 | 8.3 | 9.4 | 10.6 | 11.7 | 12.7 | 13.8 |
| 41 mm | 4.9 | 6.1 | 7.3 | 8.5 | 9.7 | 10.8 | 11.9 | 13.1 | 14.1 |
| 1+5/8" | 4.9 | 6.2 | 7.4 | 8.6 | 9.7 | 10.9 | 12.0 | 13.1 | 14.2 |
| 42 mm | 5.0 | 6.3 | 7.5 | 8.7 | 9.9 | 11.1 | 12.2 | 13.4 | 14.5 |
| 1+11/16" | 5.1 | 6.4 | 7.7 | 8.9 | 10.1 | 11.3 | 12.5 | 13.6 | 14.8 |
| 43 mm | 5.1 | 6.4 | 7.7 | 8.9 | 10.1 | 11.3 | 12.5 | 13.7 | 14.8 |
| 44 mm | 5.3 | 6.6 | 7.9 | 9.1 | 10.4 | 11.6 | 12.8 | 14.0 | 15.2 |
| 1+3/4" | 5.3 | 6.6 | 7.9 | 9.2 | 10.5 | 11.7 | 13.0 | 14.2 | 15.3 |
| 45 mm | 5.4 | 6.7 | 8.0 | 9.3 | 10.6 | 11.9 | 13.1 | 14.3 | 15.5 |
| 46 mm | 5.5 | 6.9 | 8.2 | 9.5 | 10.9 | 12.1 | 13.4 | 14.6 | 15.9 |
| 1+13/16" | 5.5 | 6.9 | 8.2 | 9.5 | 10.9 | 12.2 | 13.4 | 14.7 | 15.9 |
| 47 mm | 5.6 | 7.0 | 8.4 | 9.7 | 11.1 | 12.4 | 13.7 | 15.0 | 16.2 |
| 1+7/8" | 5.7 | 7.1 | 8.5 | 9.9 | 11.2 | 12.6 | 13.9 | 15.2 | 16.4 |
| 48 mm | 5.7 | 7.2 | 8.6 | 10.0 | 11.3 | 12.7 | 14.0 | 15.3 | 16.6 |
| 49 mm | 5.9 | 7.3 | 8.7 | 10.2 | 11.6 | 12.9 | 14.3 | 15.6 | 16.9 |
| 1+15/16" | 5.9 | 7.3 | 8.8 | 10.2 | 11.6 | 13.0 | 14.3 | 15.7 | 17.0 |
| 50 mm | 6.0 | 7.5 | 8.9 | 10.4 | 11.8 | 13.2 | 14.6 | 15.9 | 17.2 |
| 2" | 6.1 | 7.6 | 9.1 | 10.5 | 12.0 | 13.4 | 14.8 | 16.2 | 17.5 |
| 51 mm | 6.1 | 7.6 | 9.1 | 10.6 | 12.0 | 13.5 | 14.9 | 16.2 | 17.6 |
| 52 mm | 6.2 | 7.8 | 9.3 | 10.8 | 12.3 | 13.7 | 15.2 | 16.6 | 17.9 |
| 2+1/16" | 6.3 | 7.8 | 9.4 | 10.9 | 12.4 | 13.8 | 15.3 | 16.7 | 18.1 |
| 53 mm | 6.3 | 7.9 | 9.5 | 11.0 | 12.5 | 14.0 | 15.4 | 16.9 | 18.3 |
| 2+1/8" | 6.5 | 8.1 | 9.6 | 11.2 | 12.7 | 14.2 | 15.7 | 17.2 | 18.6 |
| 54 mm | 6.5 | 8.1 | 9.6 | 11.2 | 12.7 | 14.3 | 15.7 | 17.2 | 18.6 |
| 55 mm | 6.6 | 8.2 | 9.8 | 11.4 | 13.0 | 14.5 | 16.0 | 17.5 | 19.0 |
| 2+3/16" | 6.7 | 8.3 | 9.9 | 11.5 | 13.1 | 14.7 | 16.2 | 17.7 | 19.2 |
| 56 mm | 6.7 | 8.4 | 10.0 | 11.6 | 13.2 | 14.8 | 16.3 | 17.8 | 19.3 |
| 57 mm | 6.8 | 8.5 | 10.2 | 11.8 | 13.4 | 15.0 | 16.6 | 18.2 | 19.7 |
| 2+1/4" | 6.8 | 8.5 | 10.2 | 11.9 | 13.5 | 15.1 | 16.7 | 18.2 | 19.7 |
| 58 mm | 6.9 | 8.7 | 10.4 | 12.0 | 13.7 | 15.3 | 16.9 | 18.5 | 20.0 |
| 2+5/16" | 7.0 | 8.8 | 10.5 | 12.2 | 13.9 | 15.5 | 17.1 | 18.7 | 20.3 |
| 59 mm | 7.1 | 8.8 | 10.5 | 12.2 | 13.9 | 15.6 | 17.2 | 18.8 | 20.3 |
| 60 mm | 7.2 | 9.0 | 10.7 | 12.4 | 14.2 | 15.8 | 17.5 | 19.1 | 20.7 |
| 2+3/8" | 7.2 | 9.0 | 10.8 | 12.5 | 14.2 | 15.9 | 17.6 | 19.2 | 20.8 |
| 61 mm | 7.3 | 9.1 | 10.9 | 12.7 | 14.4 | 16.1 | 17.8 | 19.4 | 21.0 |
| 2+7/16" | 7.4 | 9.2 | 11.1 | 12.8 | 14.6 | 16.3 | 18.0 | 19.7 | 21.3 |
| 62 mm | 7.4 | 9.3 | 11.1 | 12.9 | 14.6 | 16.4 | 18.1 | 19.7 | 21.4 |
| 63 mm | 7.5 | 9.4 | 11.2 | 13.1 | 14.9 | 16.6 | 18.4 | 20.1 | 21.7 |
| 2+1/2" | 7.6 | 9.5 | 11.3 | 13.2 | 15.0 | 16.8 | 18.5 | 20.2 | 21.9 |
| 64 mm | 7.7 | 9.6 | 11.4 | 13.3 | 15.1 | 16.9 | 18.7 | 20.4 | 22.1 |
| 65 mm | 7.8 | 9.7 | 11.6 | 13.5 | 15.3 | 17.2 | 18.9 | 20.7 | 22.4 |
| 2+9/16" | 7.8 | 9.7 | 11.6 | 13.5 | 15.4 | 17.2 | 19.0 | 20.7 | 22.4 |
| 66 mm | 7.9 | 9.9 | 11.8 | 13.7 | 15.6 | 17.4 | 19.2 | 21.0 | 22.8 |
| 2+5/8" | 8.0 | 10.0 | 11.9 | 13.8 | 15.7 | 17.6 | 19.4 | 21.2 | 23.0 |
| 67 mm | 8.0 | 10.0 | 12.0 | 13.9 | 15.8 | 17.7 | 19.5 | 21.3 | 23.1 |
| 68 mm | 8.1 | 10.2 | 12.1 | 14.1 | 16.0 | 17.9 | 19.8 | 21.7 | 23.4 |
| 2+11/16" | 8.2 | 10.2 | 12.2 | 14.2 | 16.1 | 18.0 | 19.9 | 21.7 | 23.5 |
| 69 mm | 8.3 | 10.3 | 12.3 | 14.3 | 16.3 | 18.2 | 20.1 | 22.0 | 23.8 |
| 2+3/4" | 8.4 | 10.4 | 12.5 | 14.5 | 16.5 | 18.4 | 20.4 | 22.2 | 24.1 |
| 70 mm | 8.4 | 10.4 | 12.5 | 14.5 | 16.5 | 18.5 | 20.4 | 22.3 | 24.1 |
| 71 mm | 8.5 | 10.6 | 12.7 | 14.7 | 16.7 | 18.7 | 20.7 | 22.6 | 24.5 |
| 2+13/16" | 8.6 | 10.7 | 12.8 | 14.8 | 16.9 | 18.9 | 20.8 | 22.7 | 24.6 |
| 72 mm | 8.6 | 10.7 | 12.9 | 14.9 | 17.0 | 19.0 | 21.0 | 22.9 | 24.8 |
| 73 mm | 8.7 | 10.9 | 13.0 | 15.1 | 17.2 | 19.3 | 21.3 | 23.2 | 25.2 |
| 2+7/8" | 8.7 | 10.9 | 13.0 | 15.1 | 17.2 | 19.3 | 21.3 | 23.3 | 25.2 |
| 74 mm | 8.9 | 11.0 | 13.2 | 15.3 | 17.5 | 19.5 | 21.6 | 23.6 | 25.5 |
| 2+15/16" | 8.9 | 11.1 | 13.3 | 15.5 | 17.6 | 19.7 | 21.7 | 23.8 | 25.7 |
| 75 mm | 9.0 | 11.2 | 13.4 | 15.6 | 17.7 | 19.8 | 21.9 | 23.9 | 25.9 |
| 76 mm | 9.1 | 11.3 | 13.6 | 15.8 | 17.9 | 20.1 | 22.2 | 24.2 | 26.2 |
| 3" | 9.1 | 11.4 | 13.6 | 15.8 | 18.0 | 20.1 | 22.2 | 24.3 | 26.3 |
| 77 mm | 9.2 | 11.5 | 13.7 | 16.0 | 18.2 | 20.3 | 22.4 | 24.5 | 26.6 |
| 3+1/16" | 9.3 | 11.6 | 13.9 | 16.1 | 18.3 | 20.5 | 22.7 | 24.8 | 26.8 |
| 78 mm | 9.3 | 11.6 | 13.9 | 16.2 | 18.4 | 20.6 | 22.7 | 24.8 | 26.9 |
| 79 mm | 9.5 | 11.8 | 14.1 | 16.4 | 18.6 | 20.8 | 23.0 | 25.2 | 27.2 |
| 3+1/8" | 9.5 | 11.8 | 14.2 | 16.5 | 18.7 | 20.9 | 23.1 | 25.3 | 27.4 |
| 80 mm | 9.6 | 11.9 | 14.3 | 16.6 | 18.9 | 21.1 | 23.3 | 25.5 | 27.6 |
| 3+3/16" | 9.7 | 12.1 | 14.5 | 16.8 | 19.1 | 21.4 | 23.6 | 25.8 | 27.9 |
| 81 mm | 9.7 | 12.1 | 14.5 | 16.8 | 19.1 | 21.4 | 23.6 | 25.8 | 27.9 |
| 82 mm | 9.8 | 12.2 | 14.6 | 17.0 | 19.3 | 21.6 | 23.9 | 26.1 | 28.3 |
| 3+1/4" | 9.9 | 12.3 | 14.7 | 17.1 | 19.5 | 21.8 | 24.1 | 26.3 | 28.5 |
| SharpeningAngles.com ©2026 All Rights Reserved | |||||||||
Our Sharpening Angle to Coin Stack Table has been developed to allow one to easily orient a blade on a sharpening stone at a desired angle with just a ruler and stack of U.S. circulated pennies. The vertical axis of the table is the measured height (from spine to cutting edge) of the blade to be sharpened. The horizontal axes is the desired sharpening angle. The body of the table is the number of U.S. pennies in the stack that you align the spine with to achieve the desired angle. Fractional or partial pennies are given as a reference to allow one to see if they should align the center of the spine a hair higher or lower than the stack. The table results are based on a 1.47mm average thickness of a circulated U.S. penny.
Items you will need
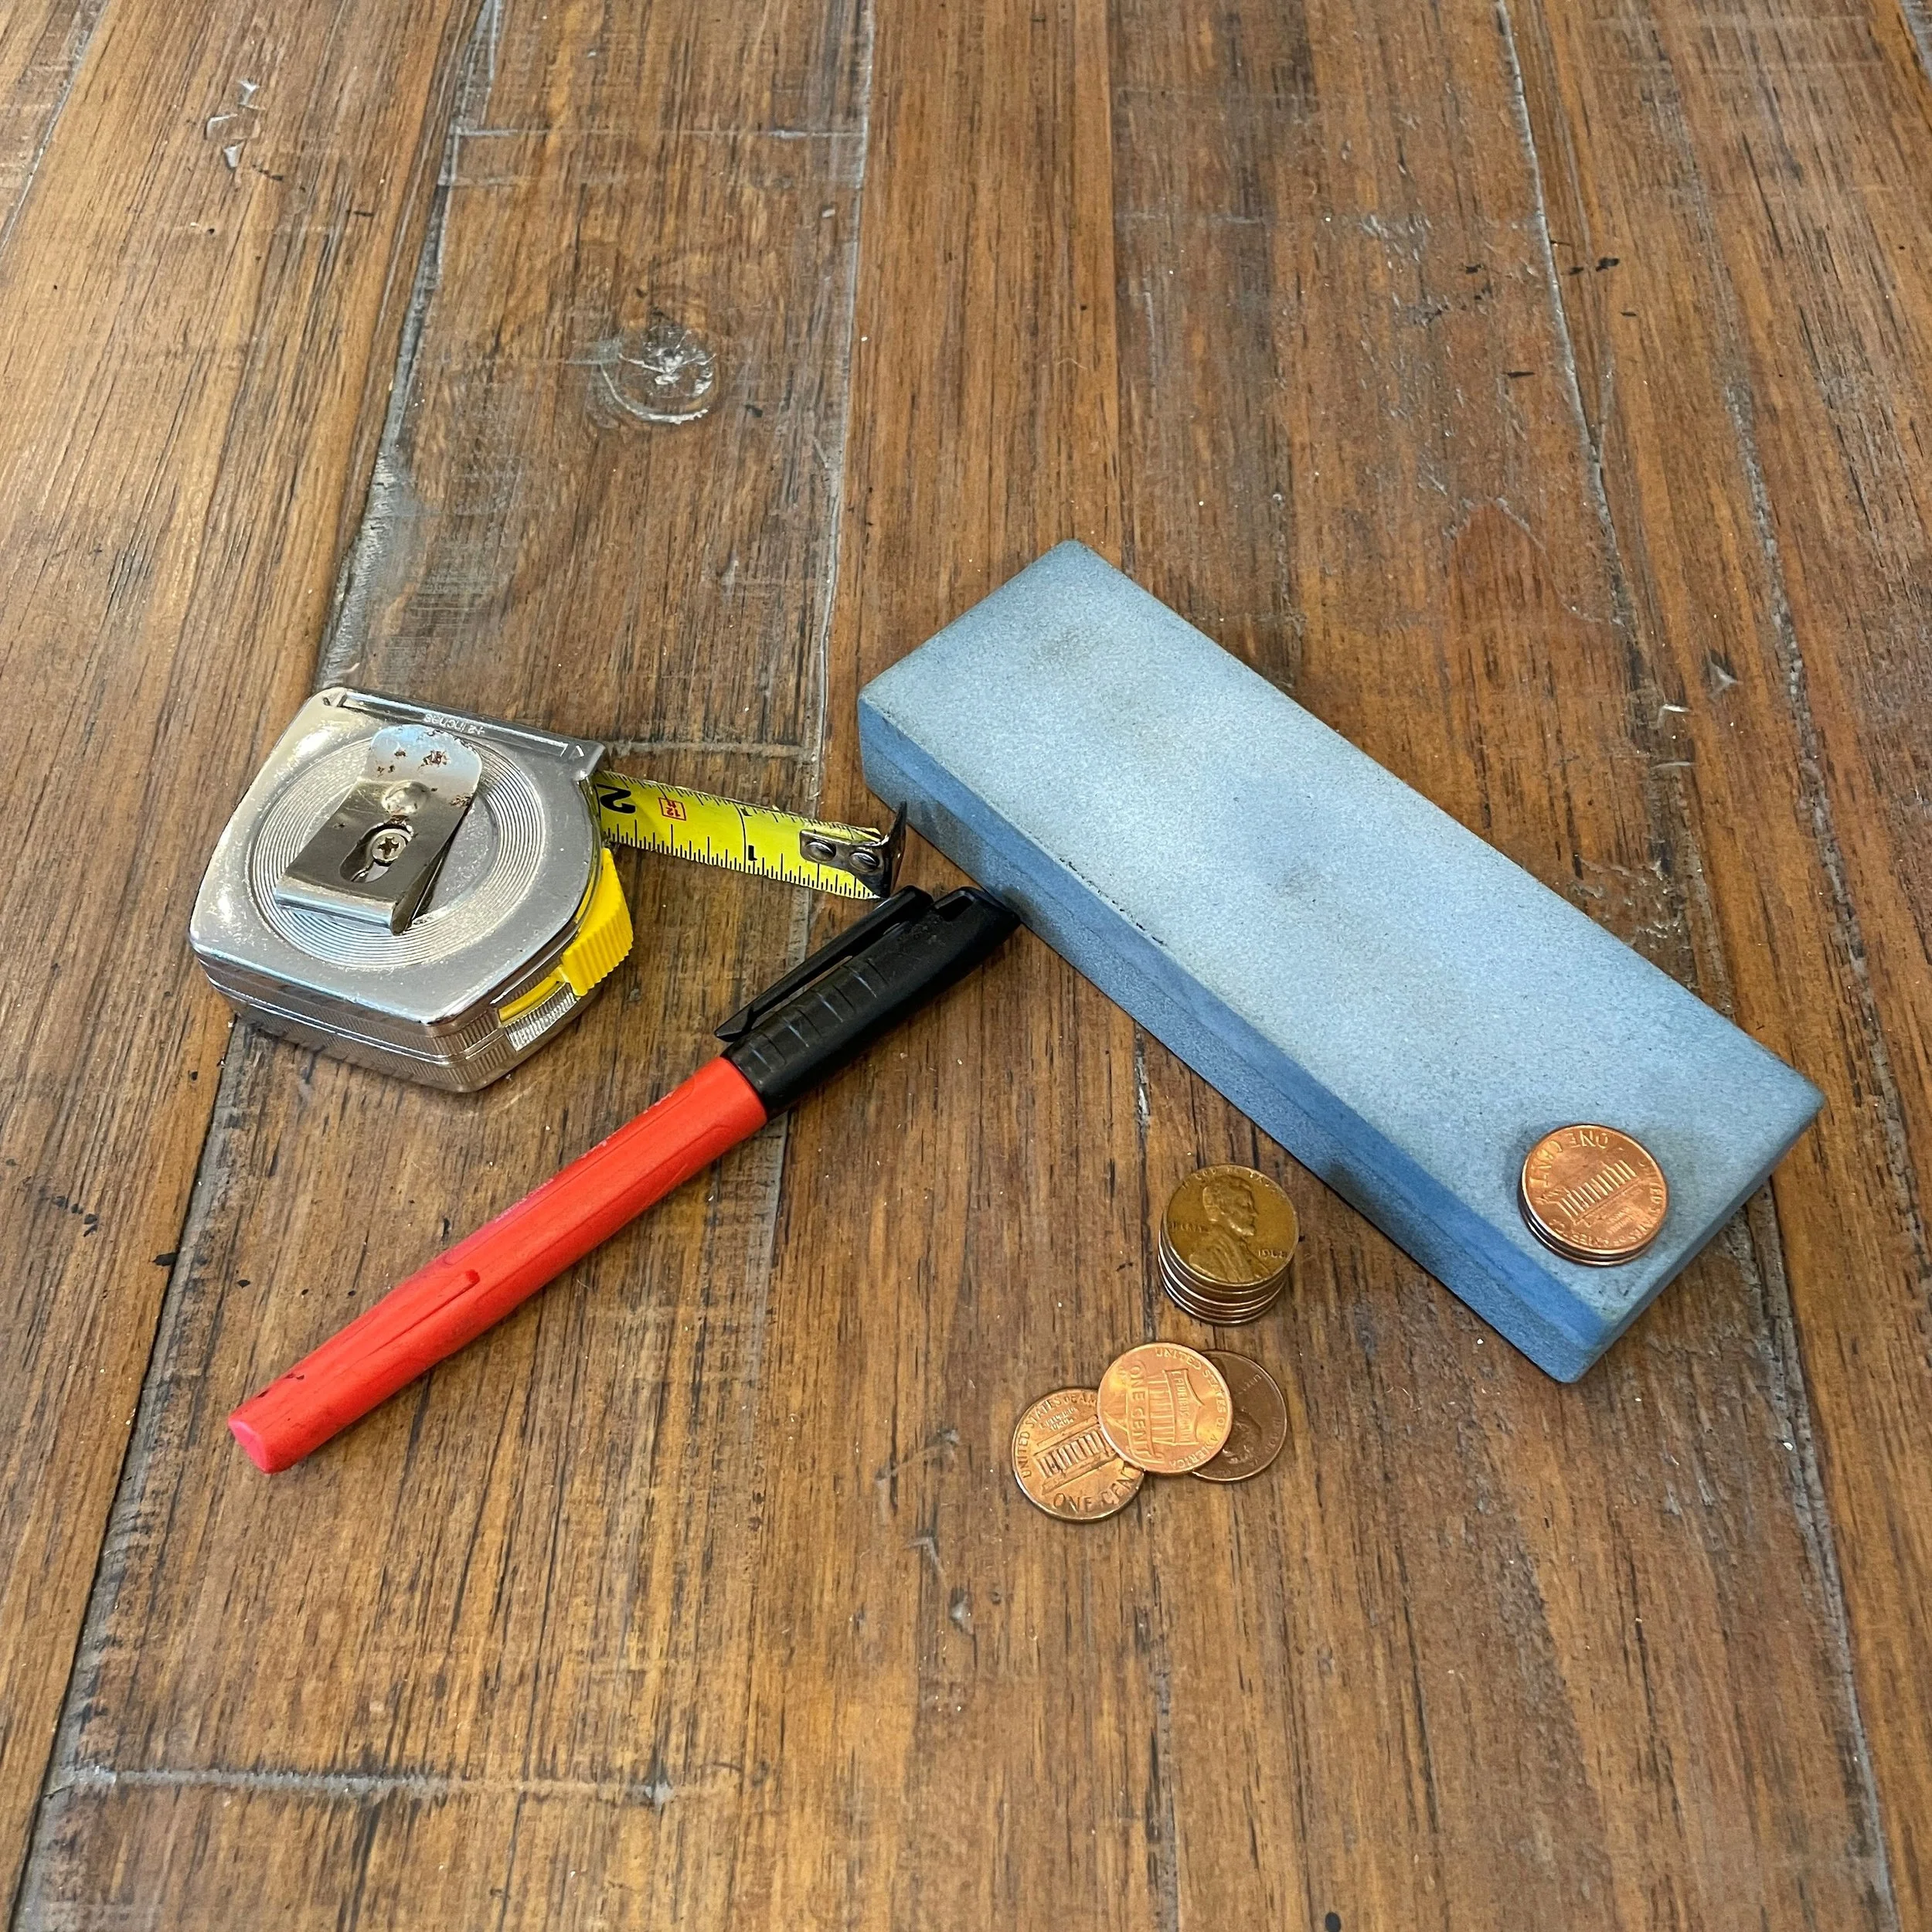
To utilize the table to sharpen a blade to a specific angle or determine a current angle you will need a standard or metric ruler, several U.S. pennies, a permanent marker and a flat sharpening (whet) stone. The sharpening stone can be a water stone, oil stone or diamond stone.
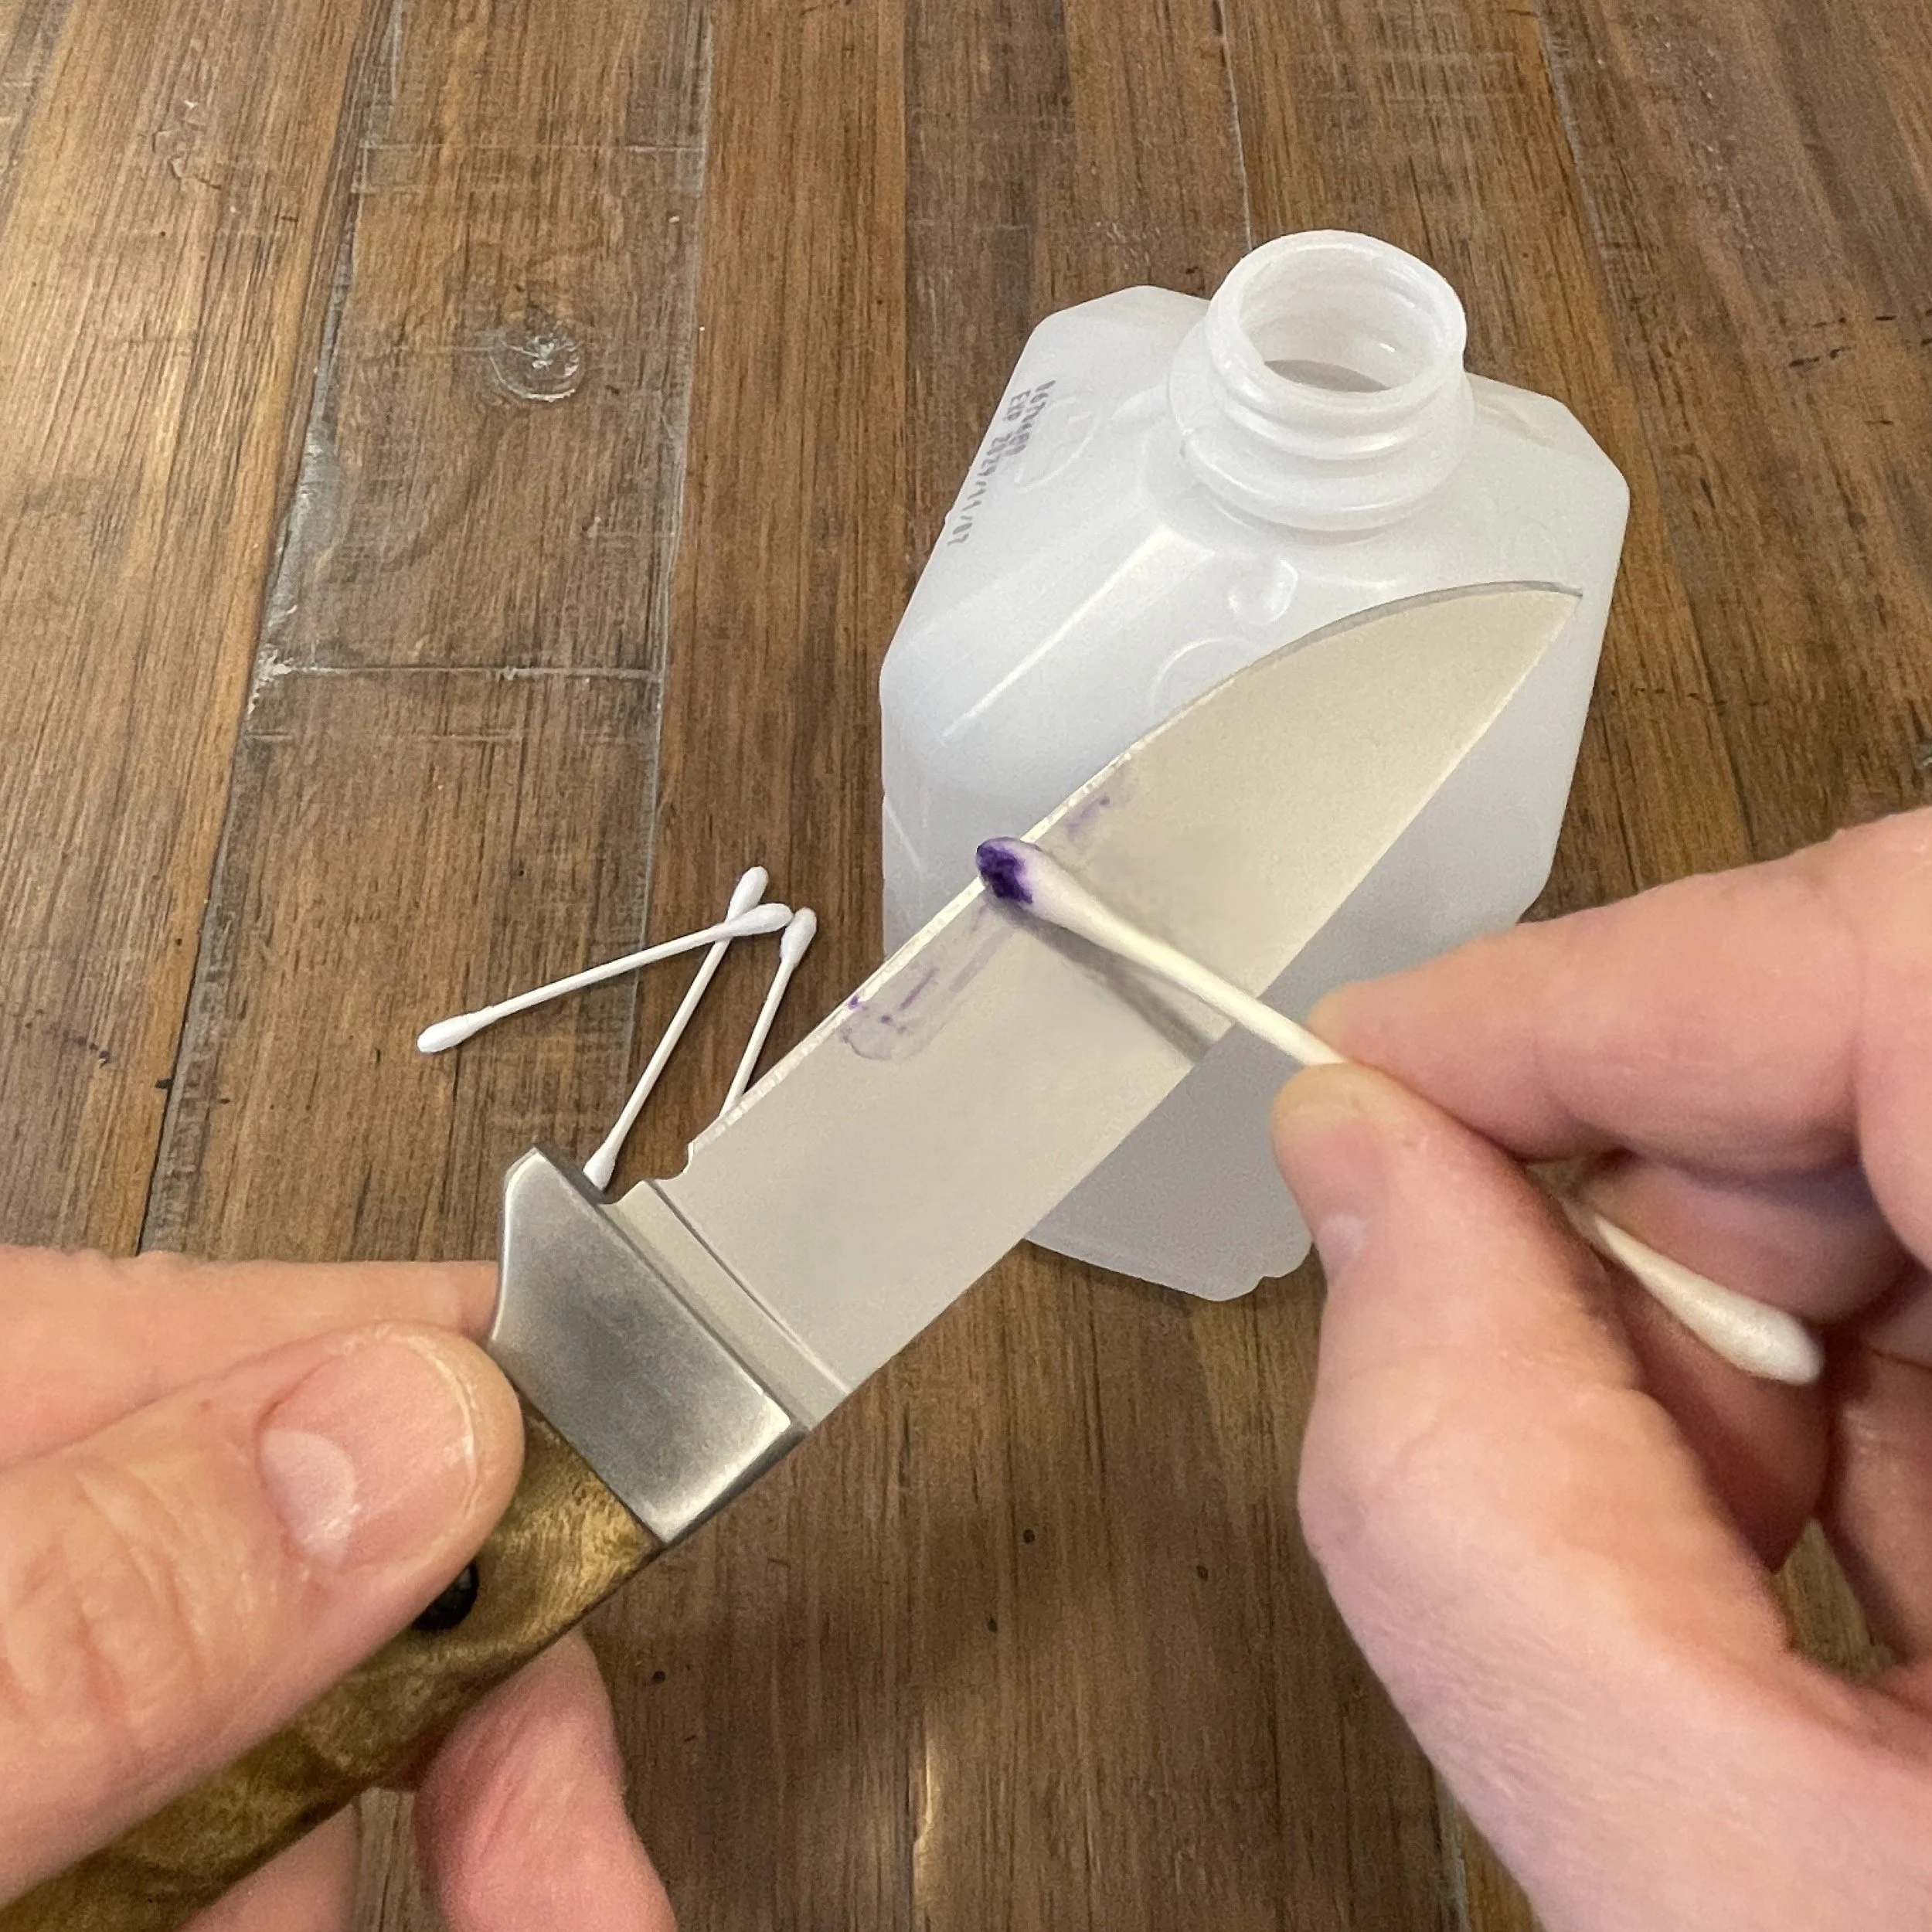
Rubbing alcohol and cotton swabs can be used to remove permanent marker from your blade.
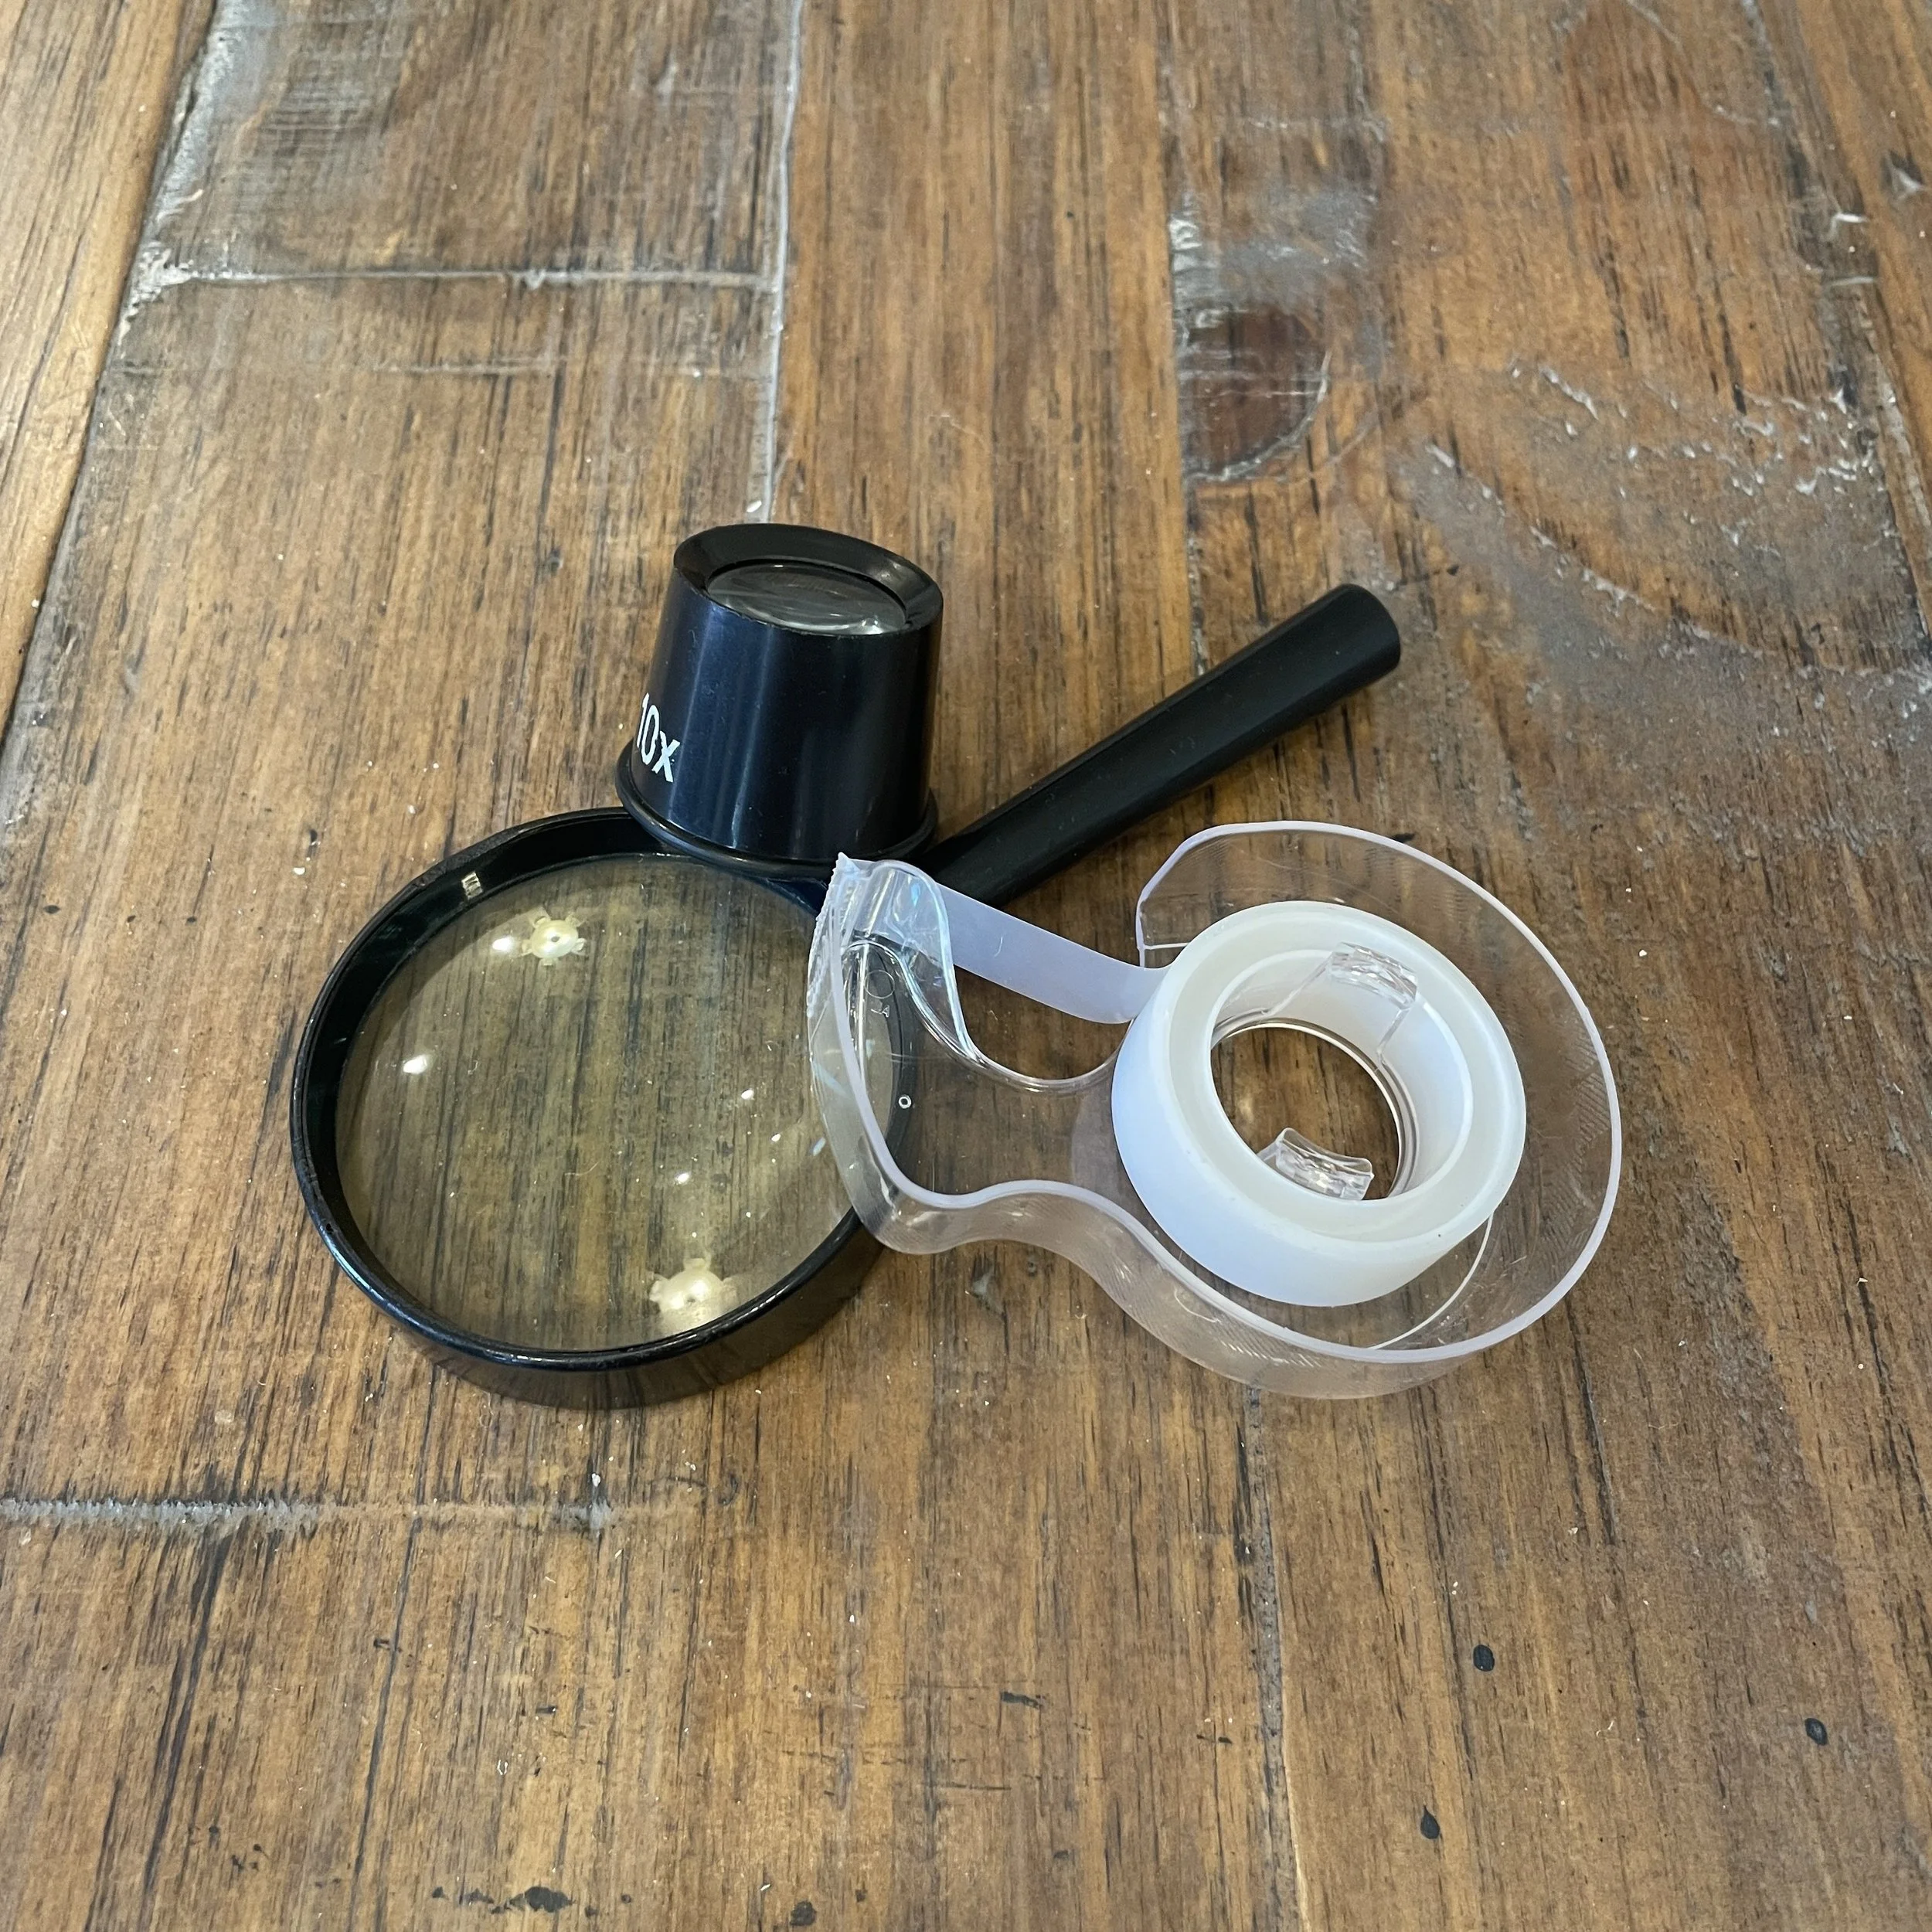
Optional items include a magnifying glass and/or jewelers loupe and clear tape. A magnifying glass and/or jewelers loupe are useful for careful inspection of the cutting edge. They can be found online or at discount tool retainers for only a few dollars. Clear tape can be used to hold the coin stack together if the stack is falling as you move it from one end of the stone to the other. A single loop of tape is sufficient and it adds minimal height to the coin stack.
Instructions:
How to determine your knifes current bevel angle with a coin stack
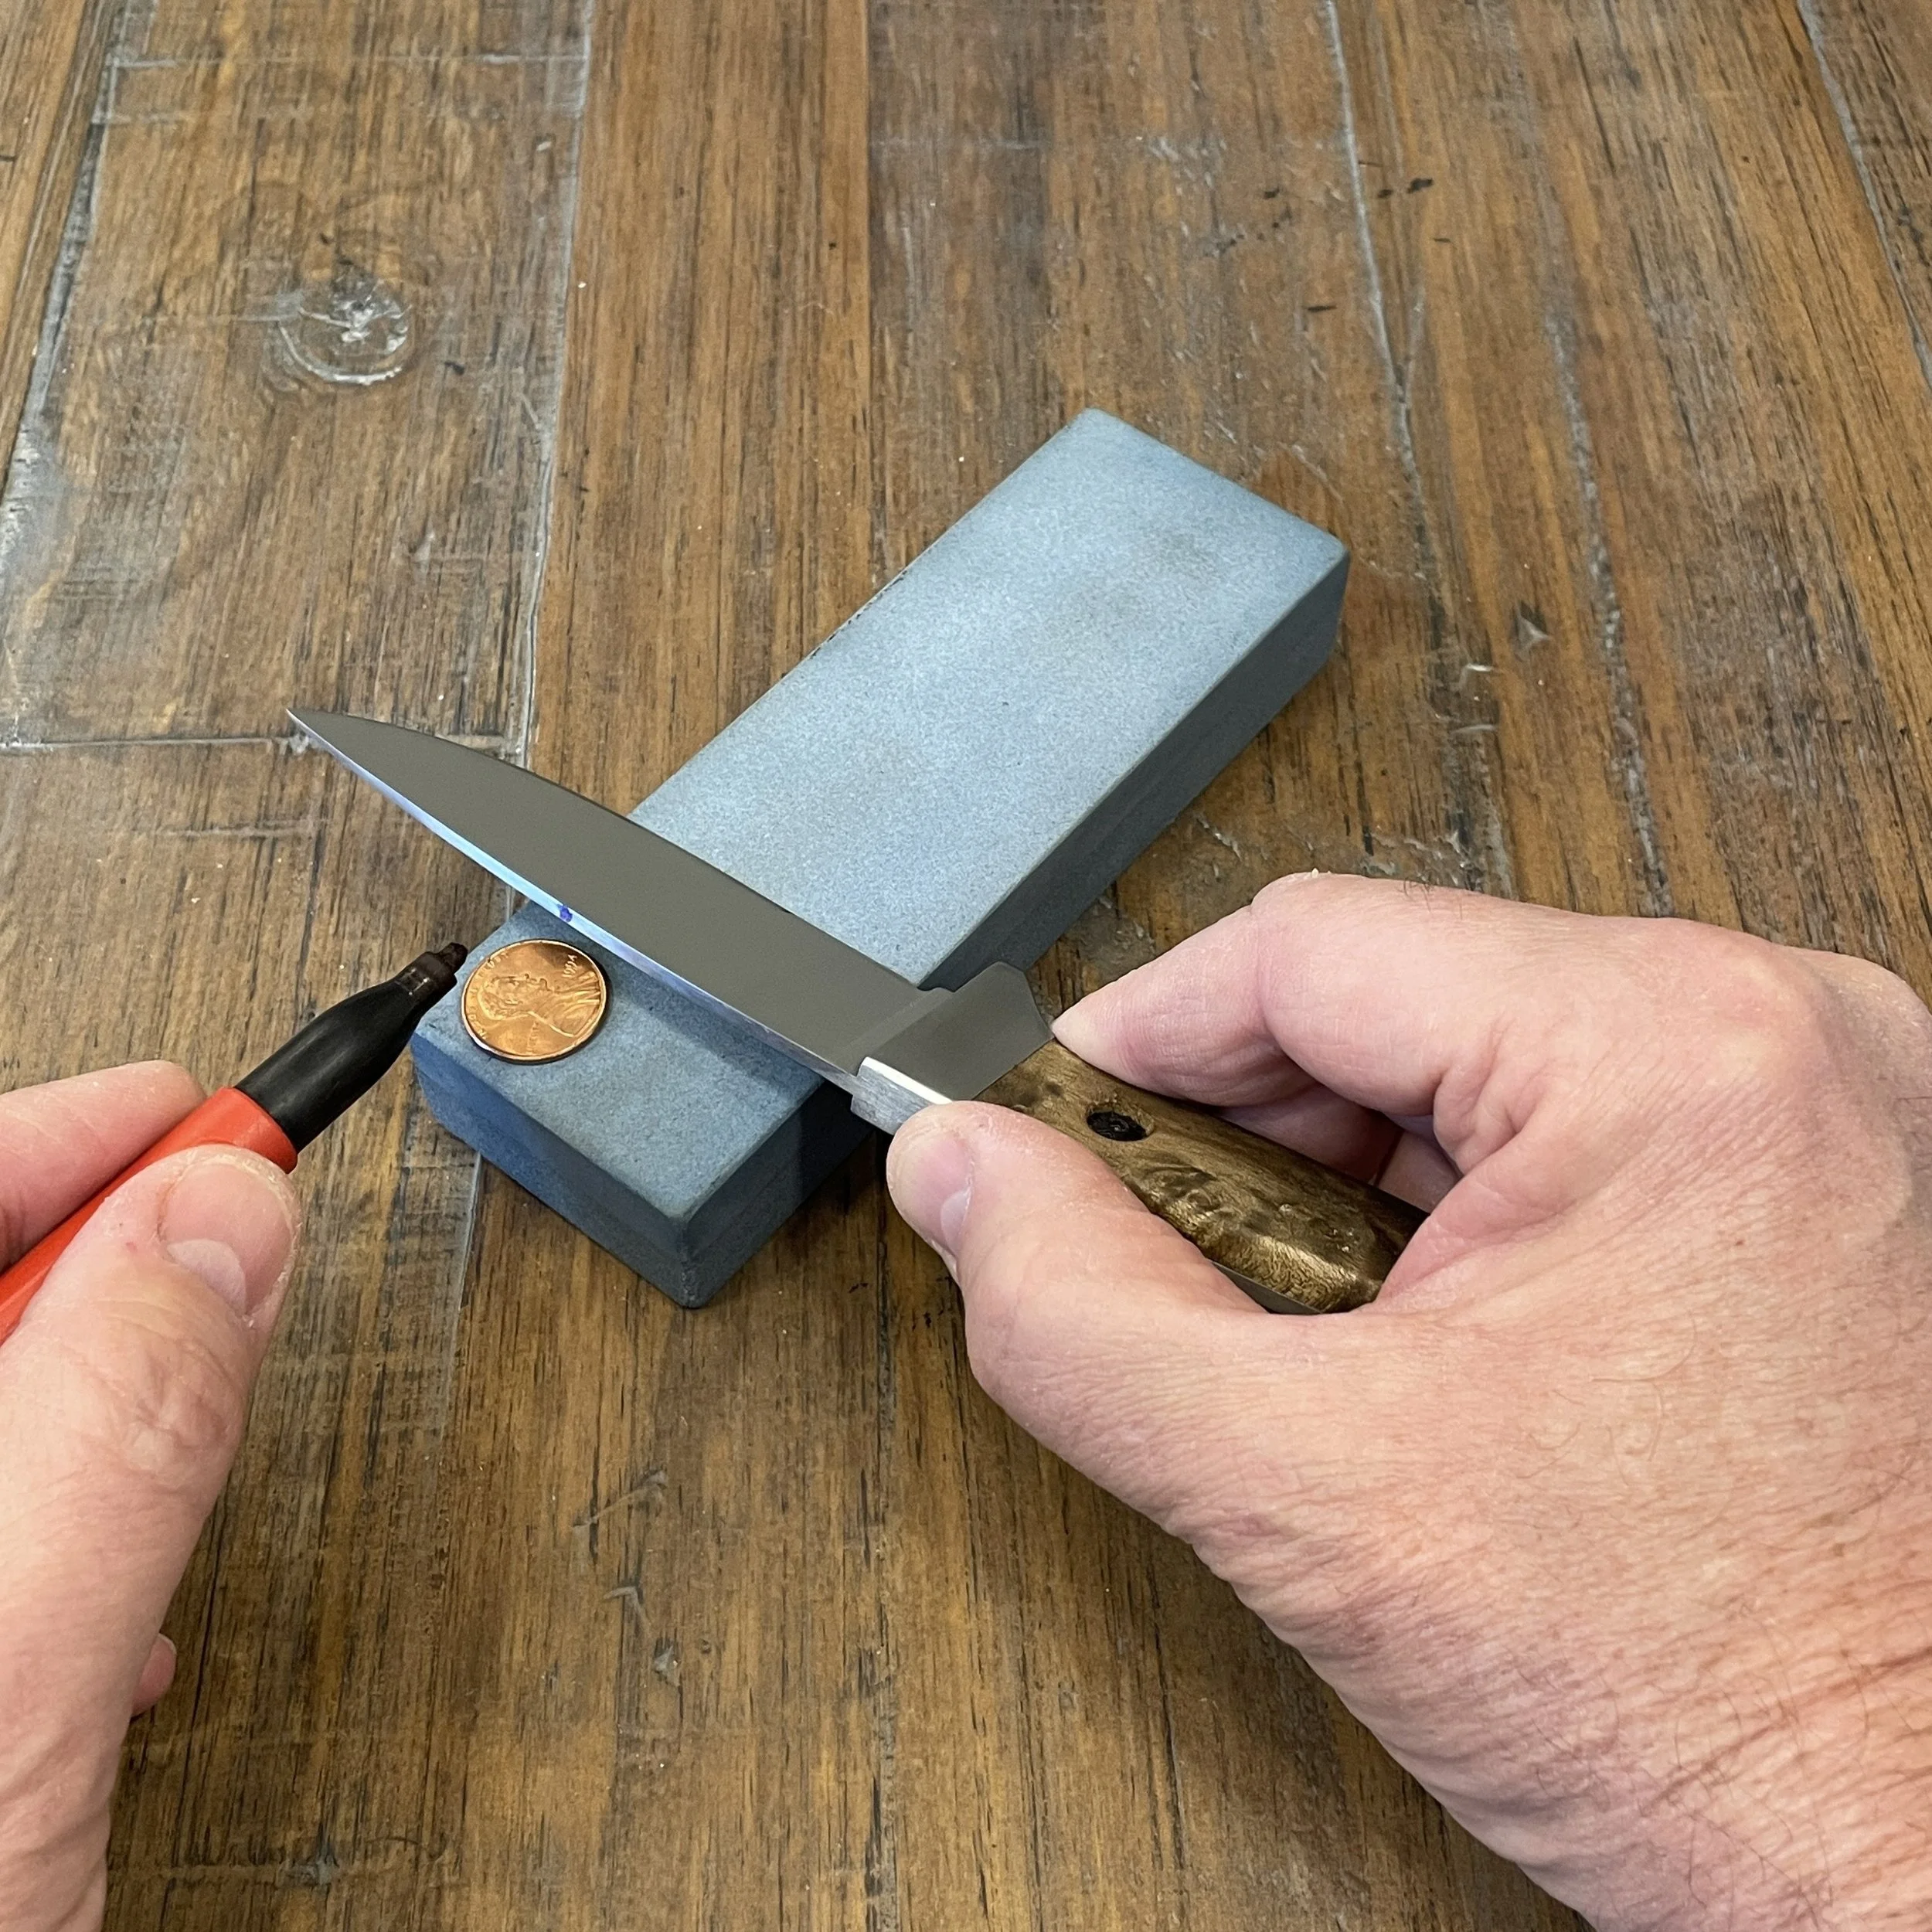
Gently lay your knife across the near end of the stone and place a penny on the corner near corner opposite the handle. With the permanent marker put a dot on the spine that aligns with the center of the penny.
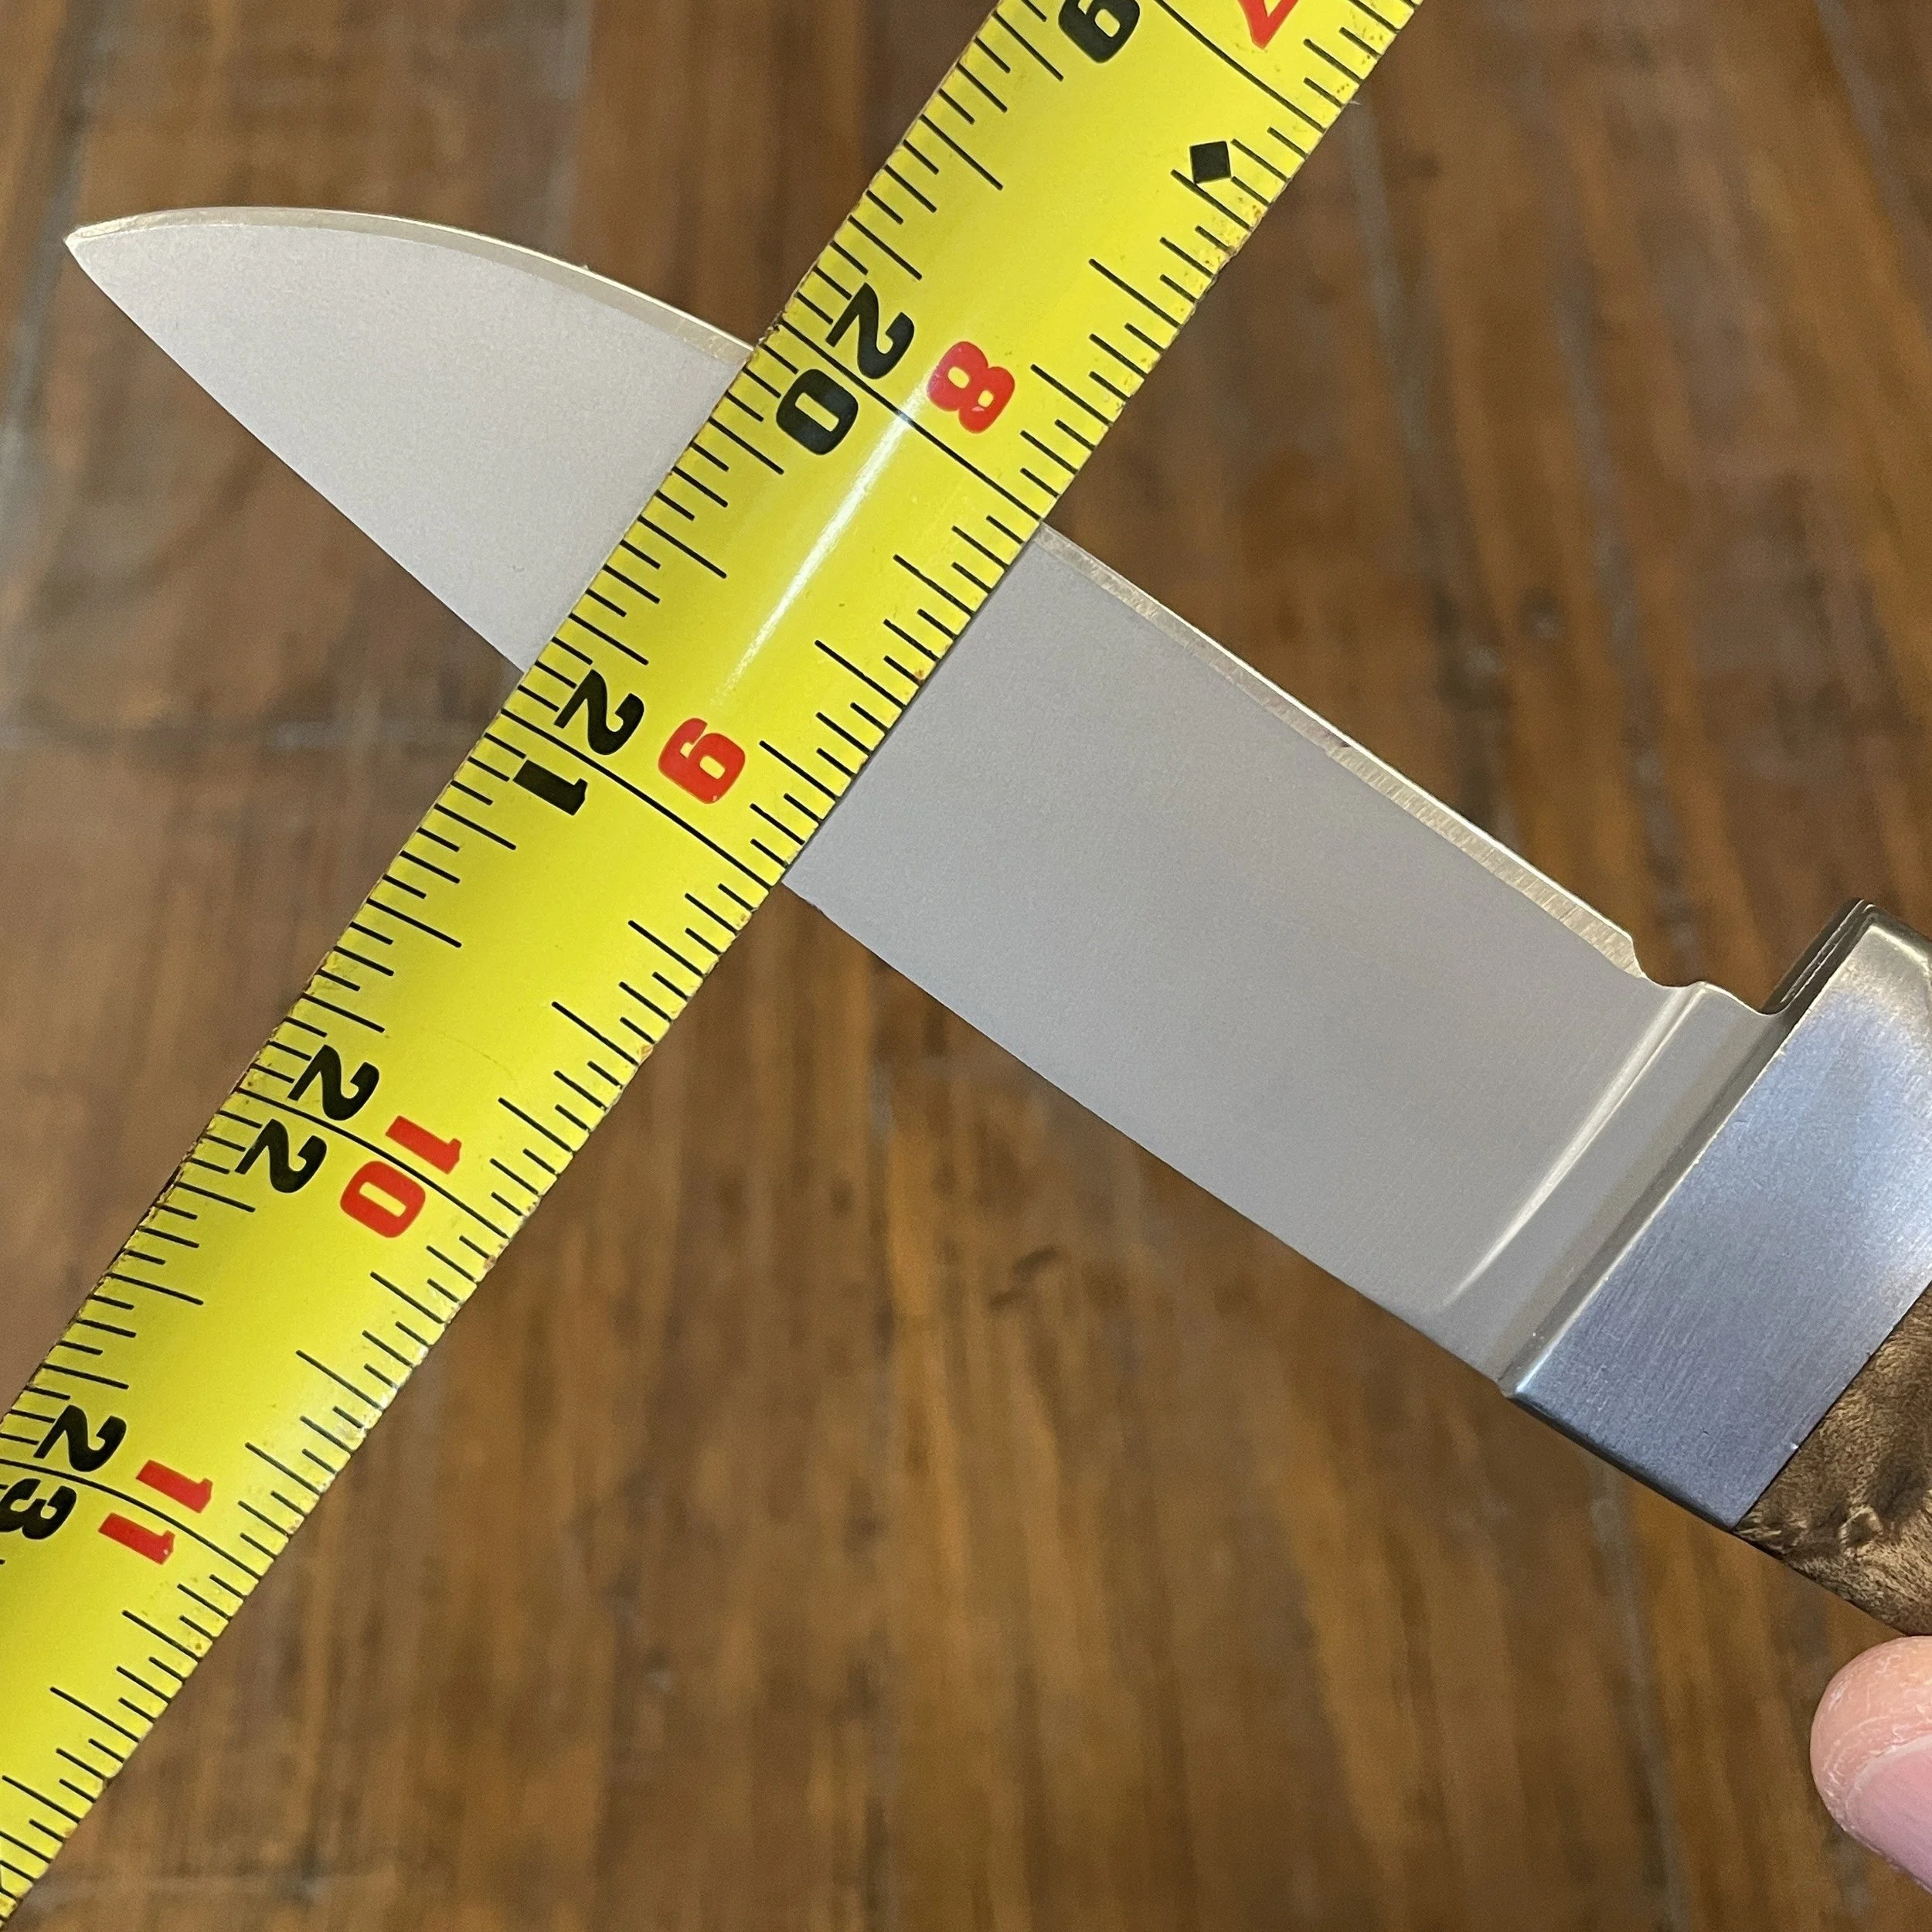
Measure the height (spine to cutting edge) of the blade at the point where you put the dot on the spine of the blade. In the image above the blade height is 1 inch.
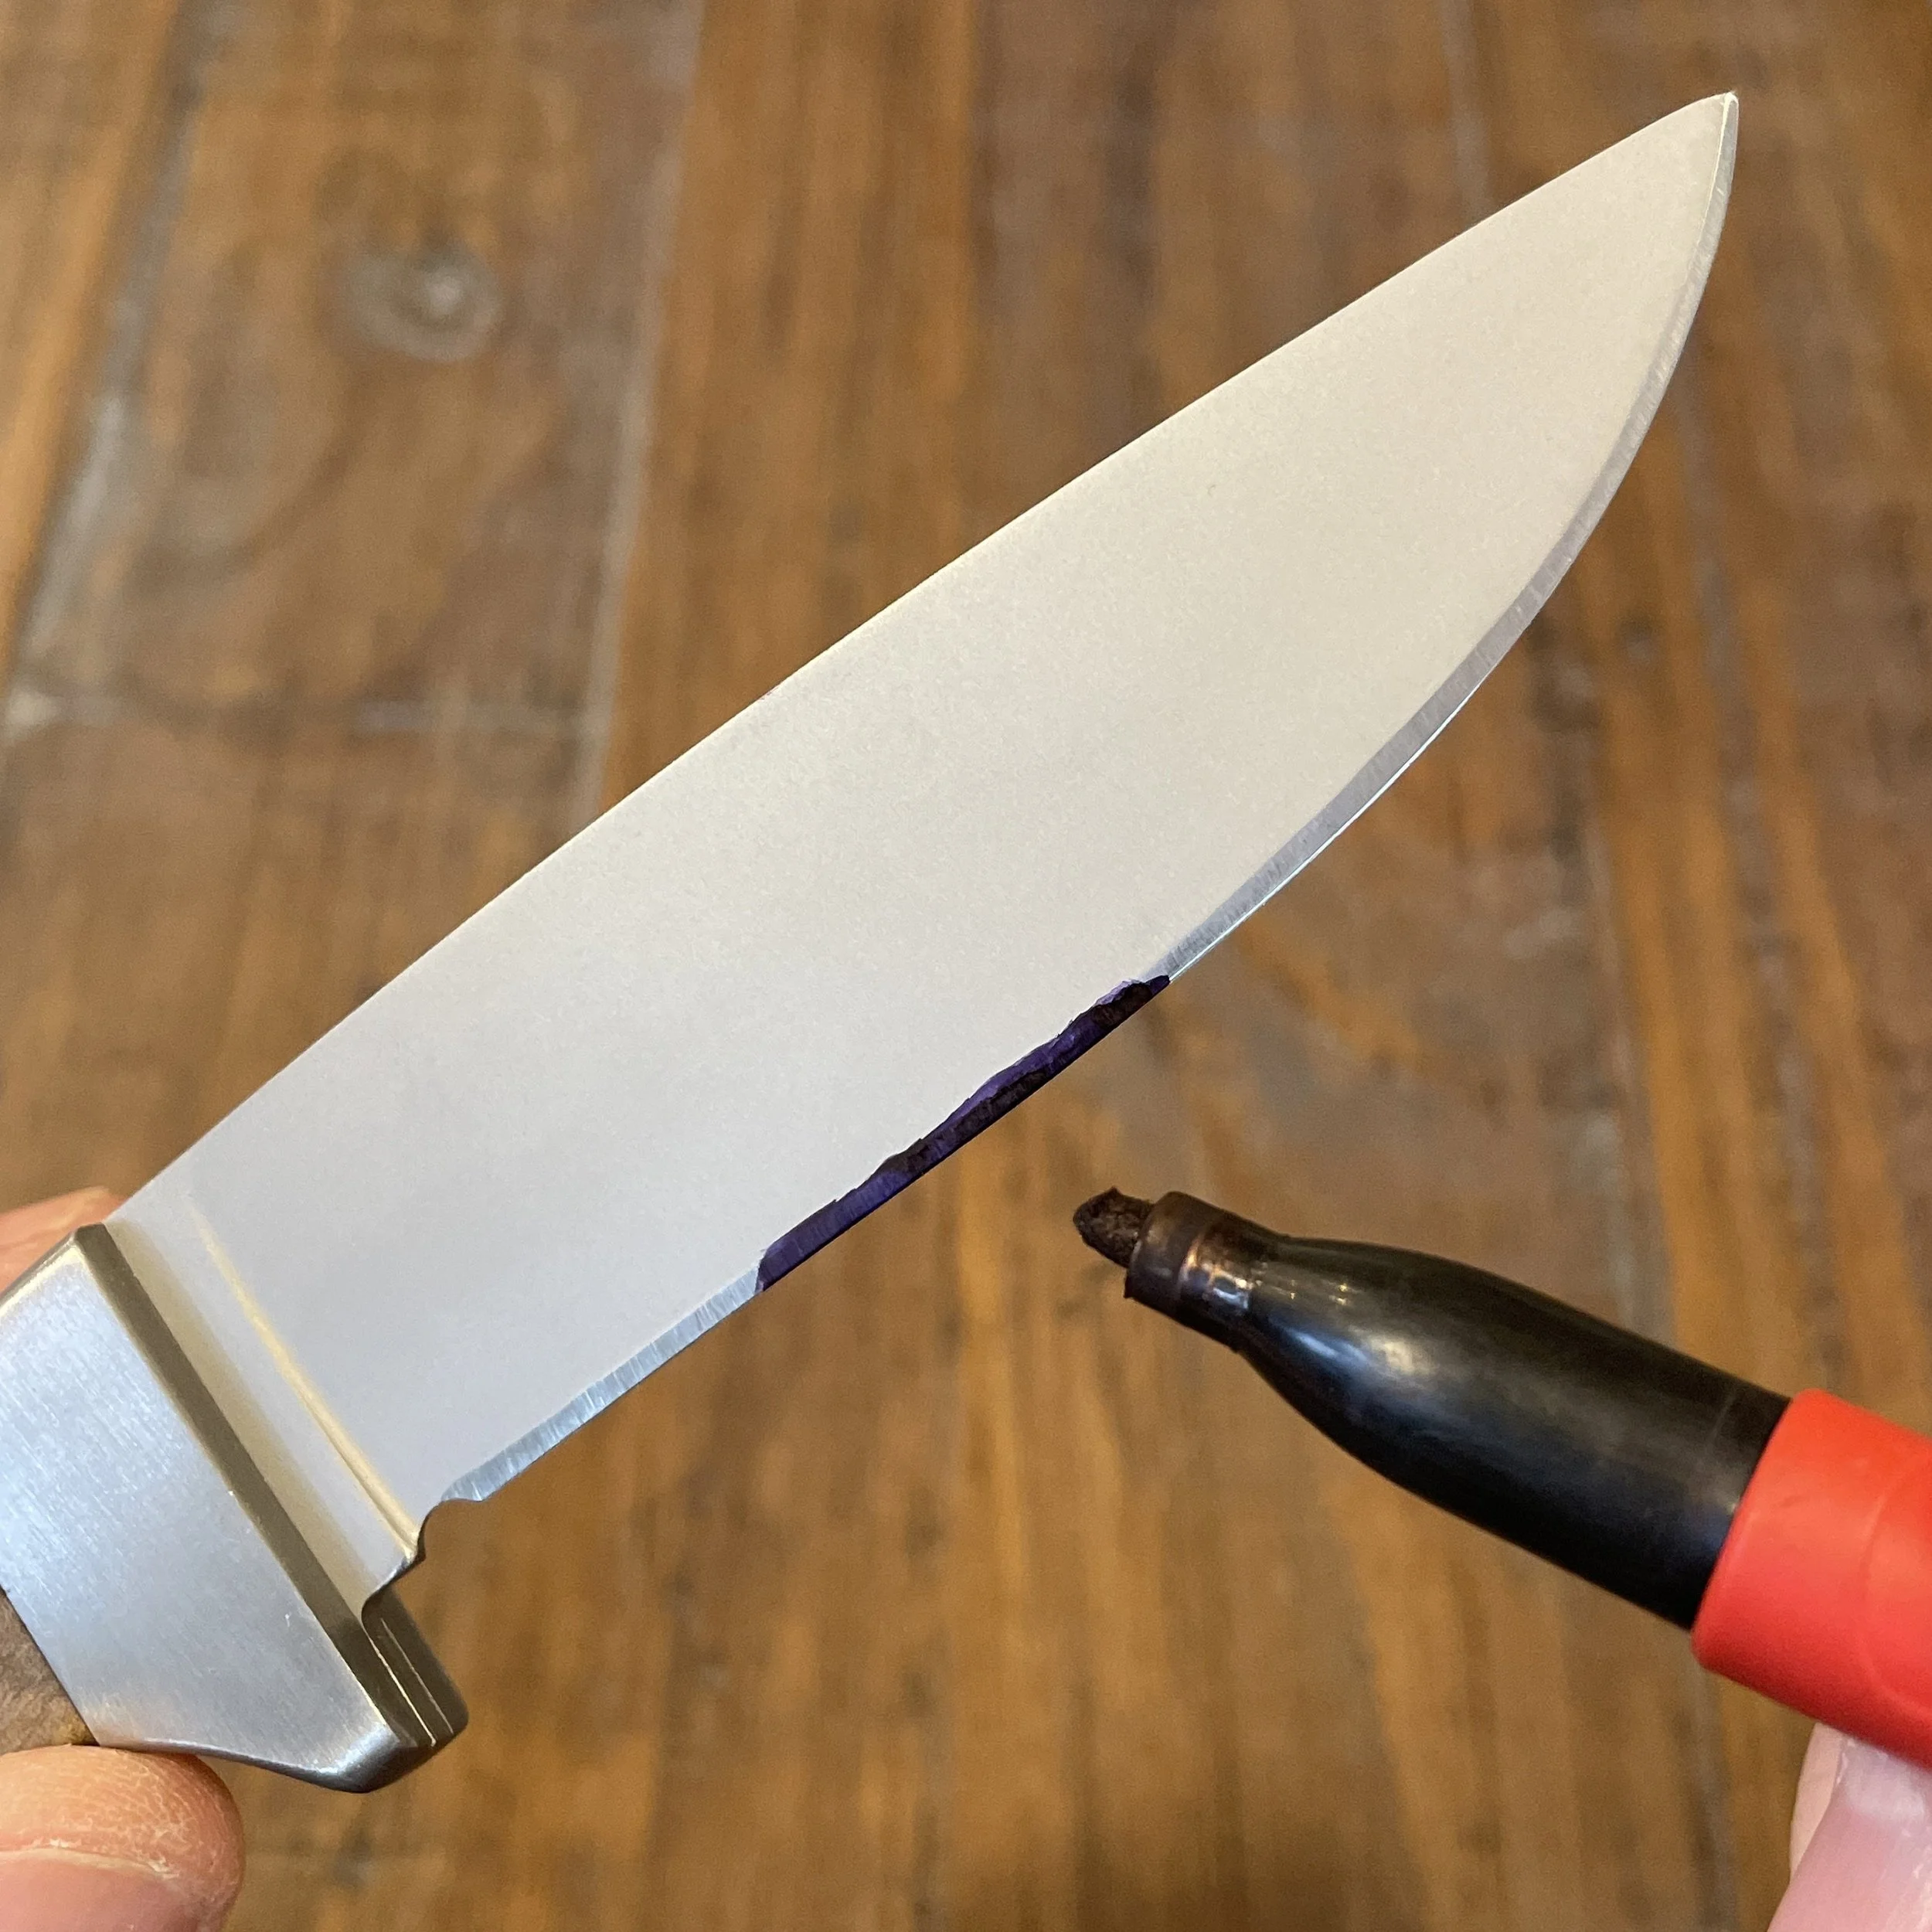
Carefully mark a portion of both sides of the cutting edge with the permanent marker. Be sure that the mark is wide enough to cover all bevels forming the cutting edge. Alternatively you can mark both sides of the entire cutting edge. This could help you to understand when bevels near the base of the blade are drastically different than those near the tip.
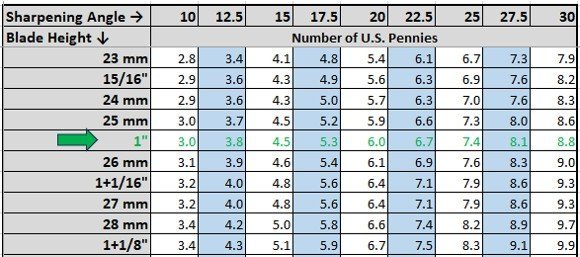
Locate your measured blade height in the left column of the table. In this case 1 inch. Notice the increasing count of pennies across that row. Each count of pennies corresponds to a Sharpening Angle or Bevel Angle in degrees per side (dps).
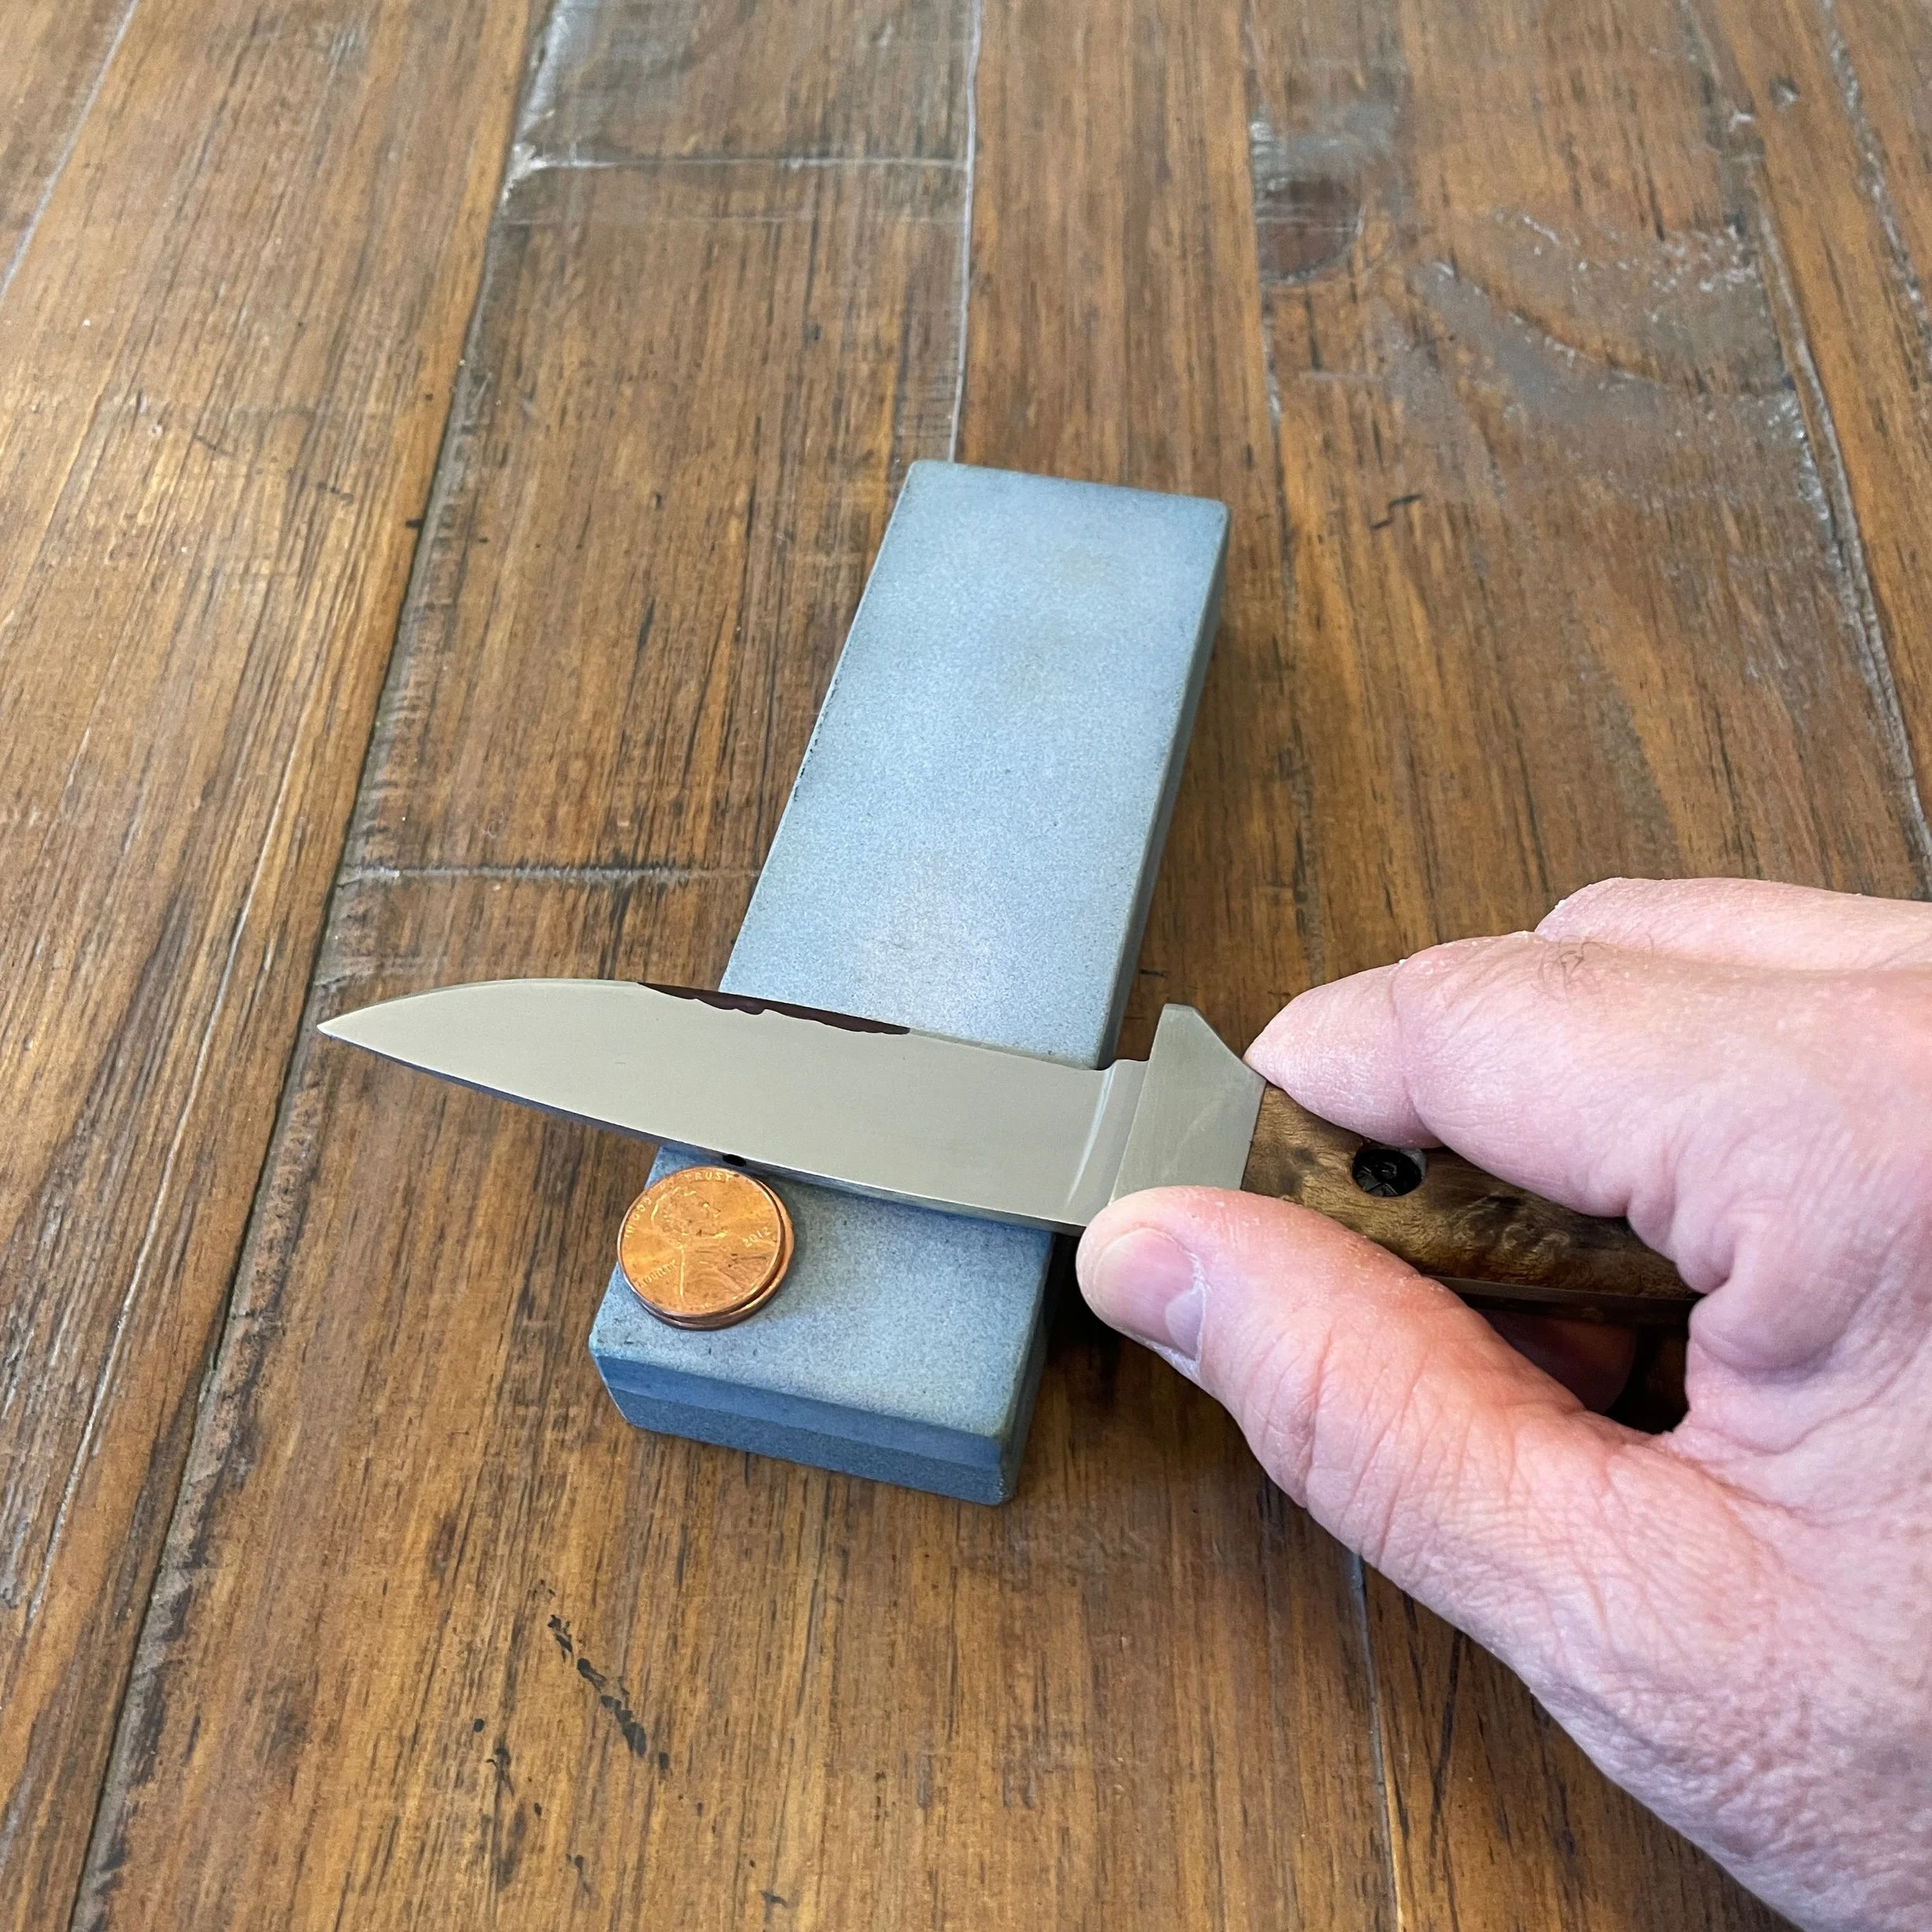
Put the number of pennies that corresponds to 10° on the corner of the stone. In this example 3 pennies result in an angle of 10°. Align the dot on the spine of the blade with the top edge of the coin stack.
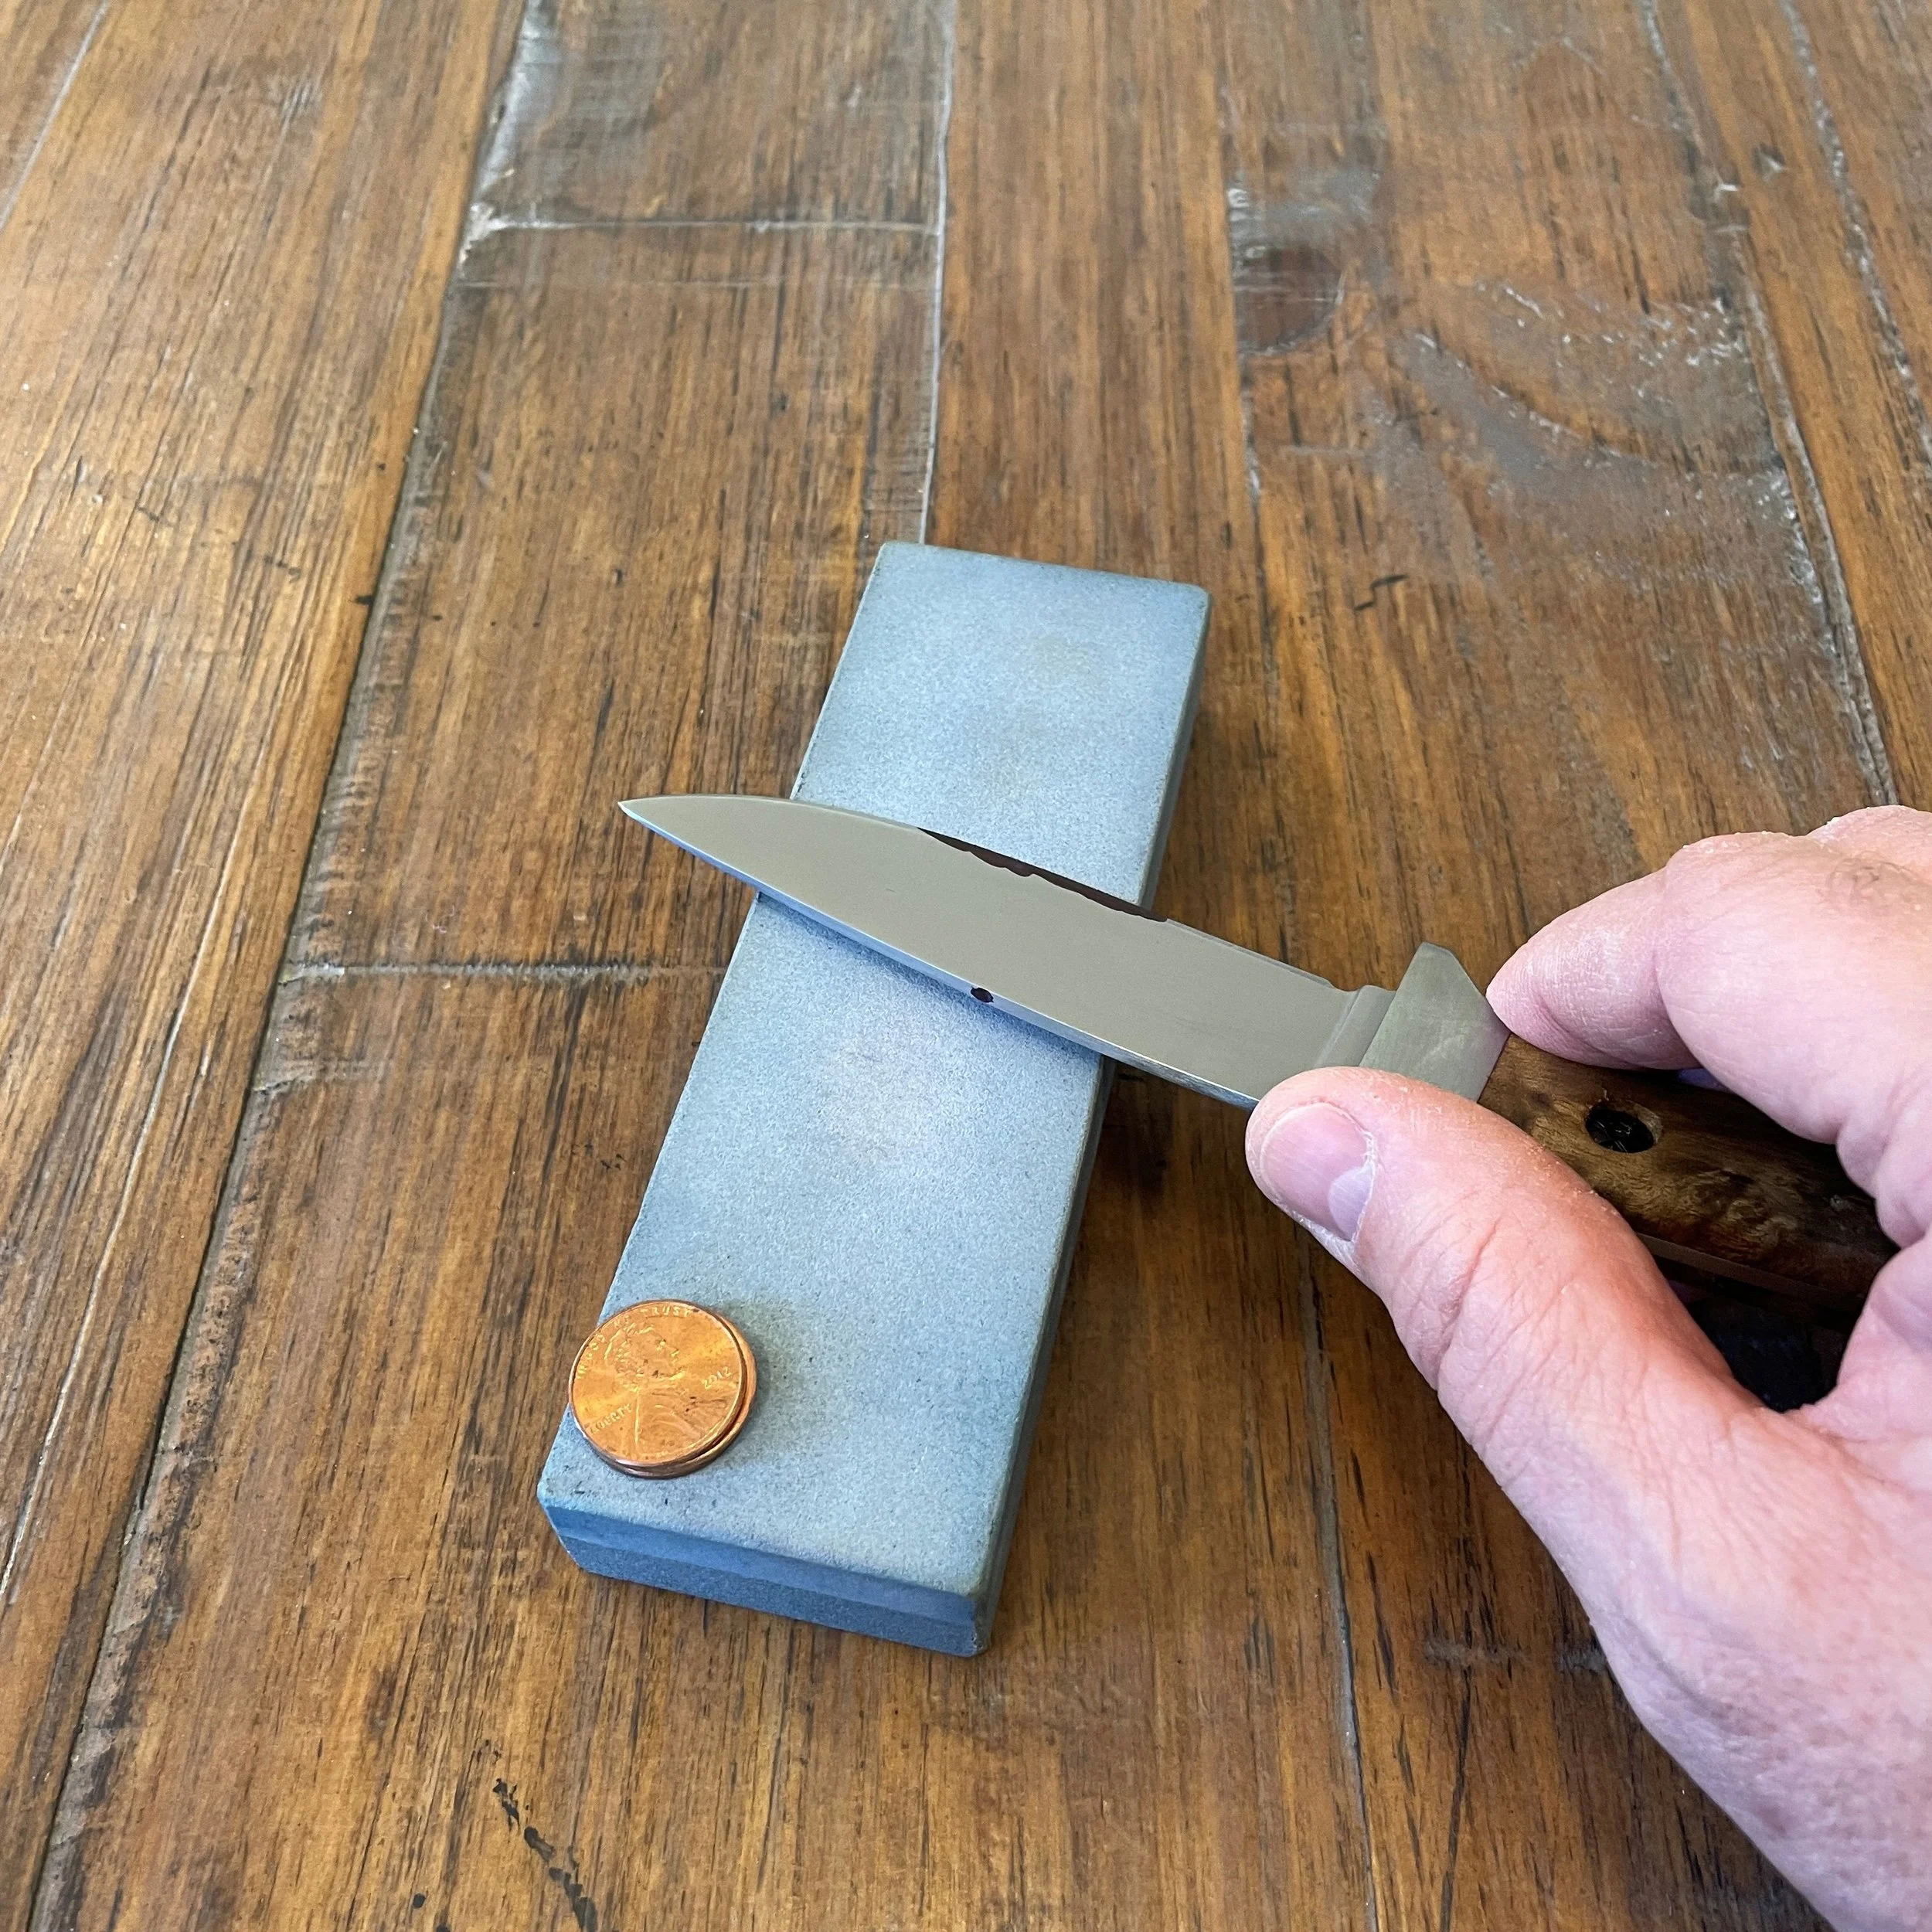
Carefully take a single typical sharpening pass with light pressure while trying your best to maintain through the entire stroke the same angle as when aligned with the pennies.
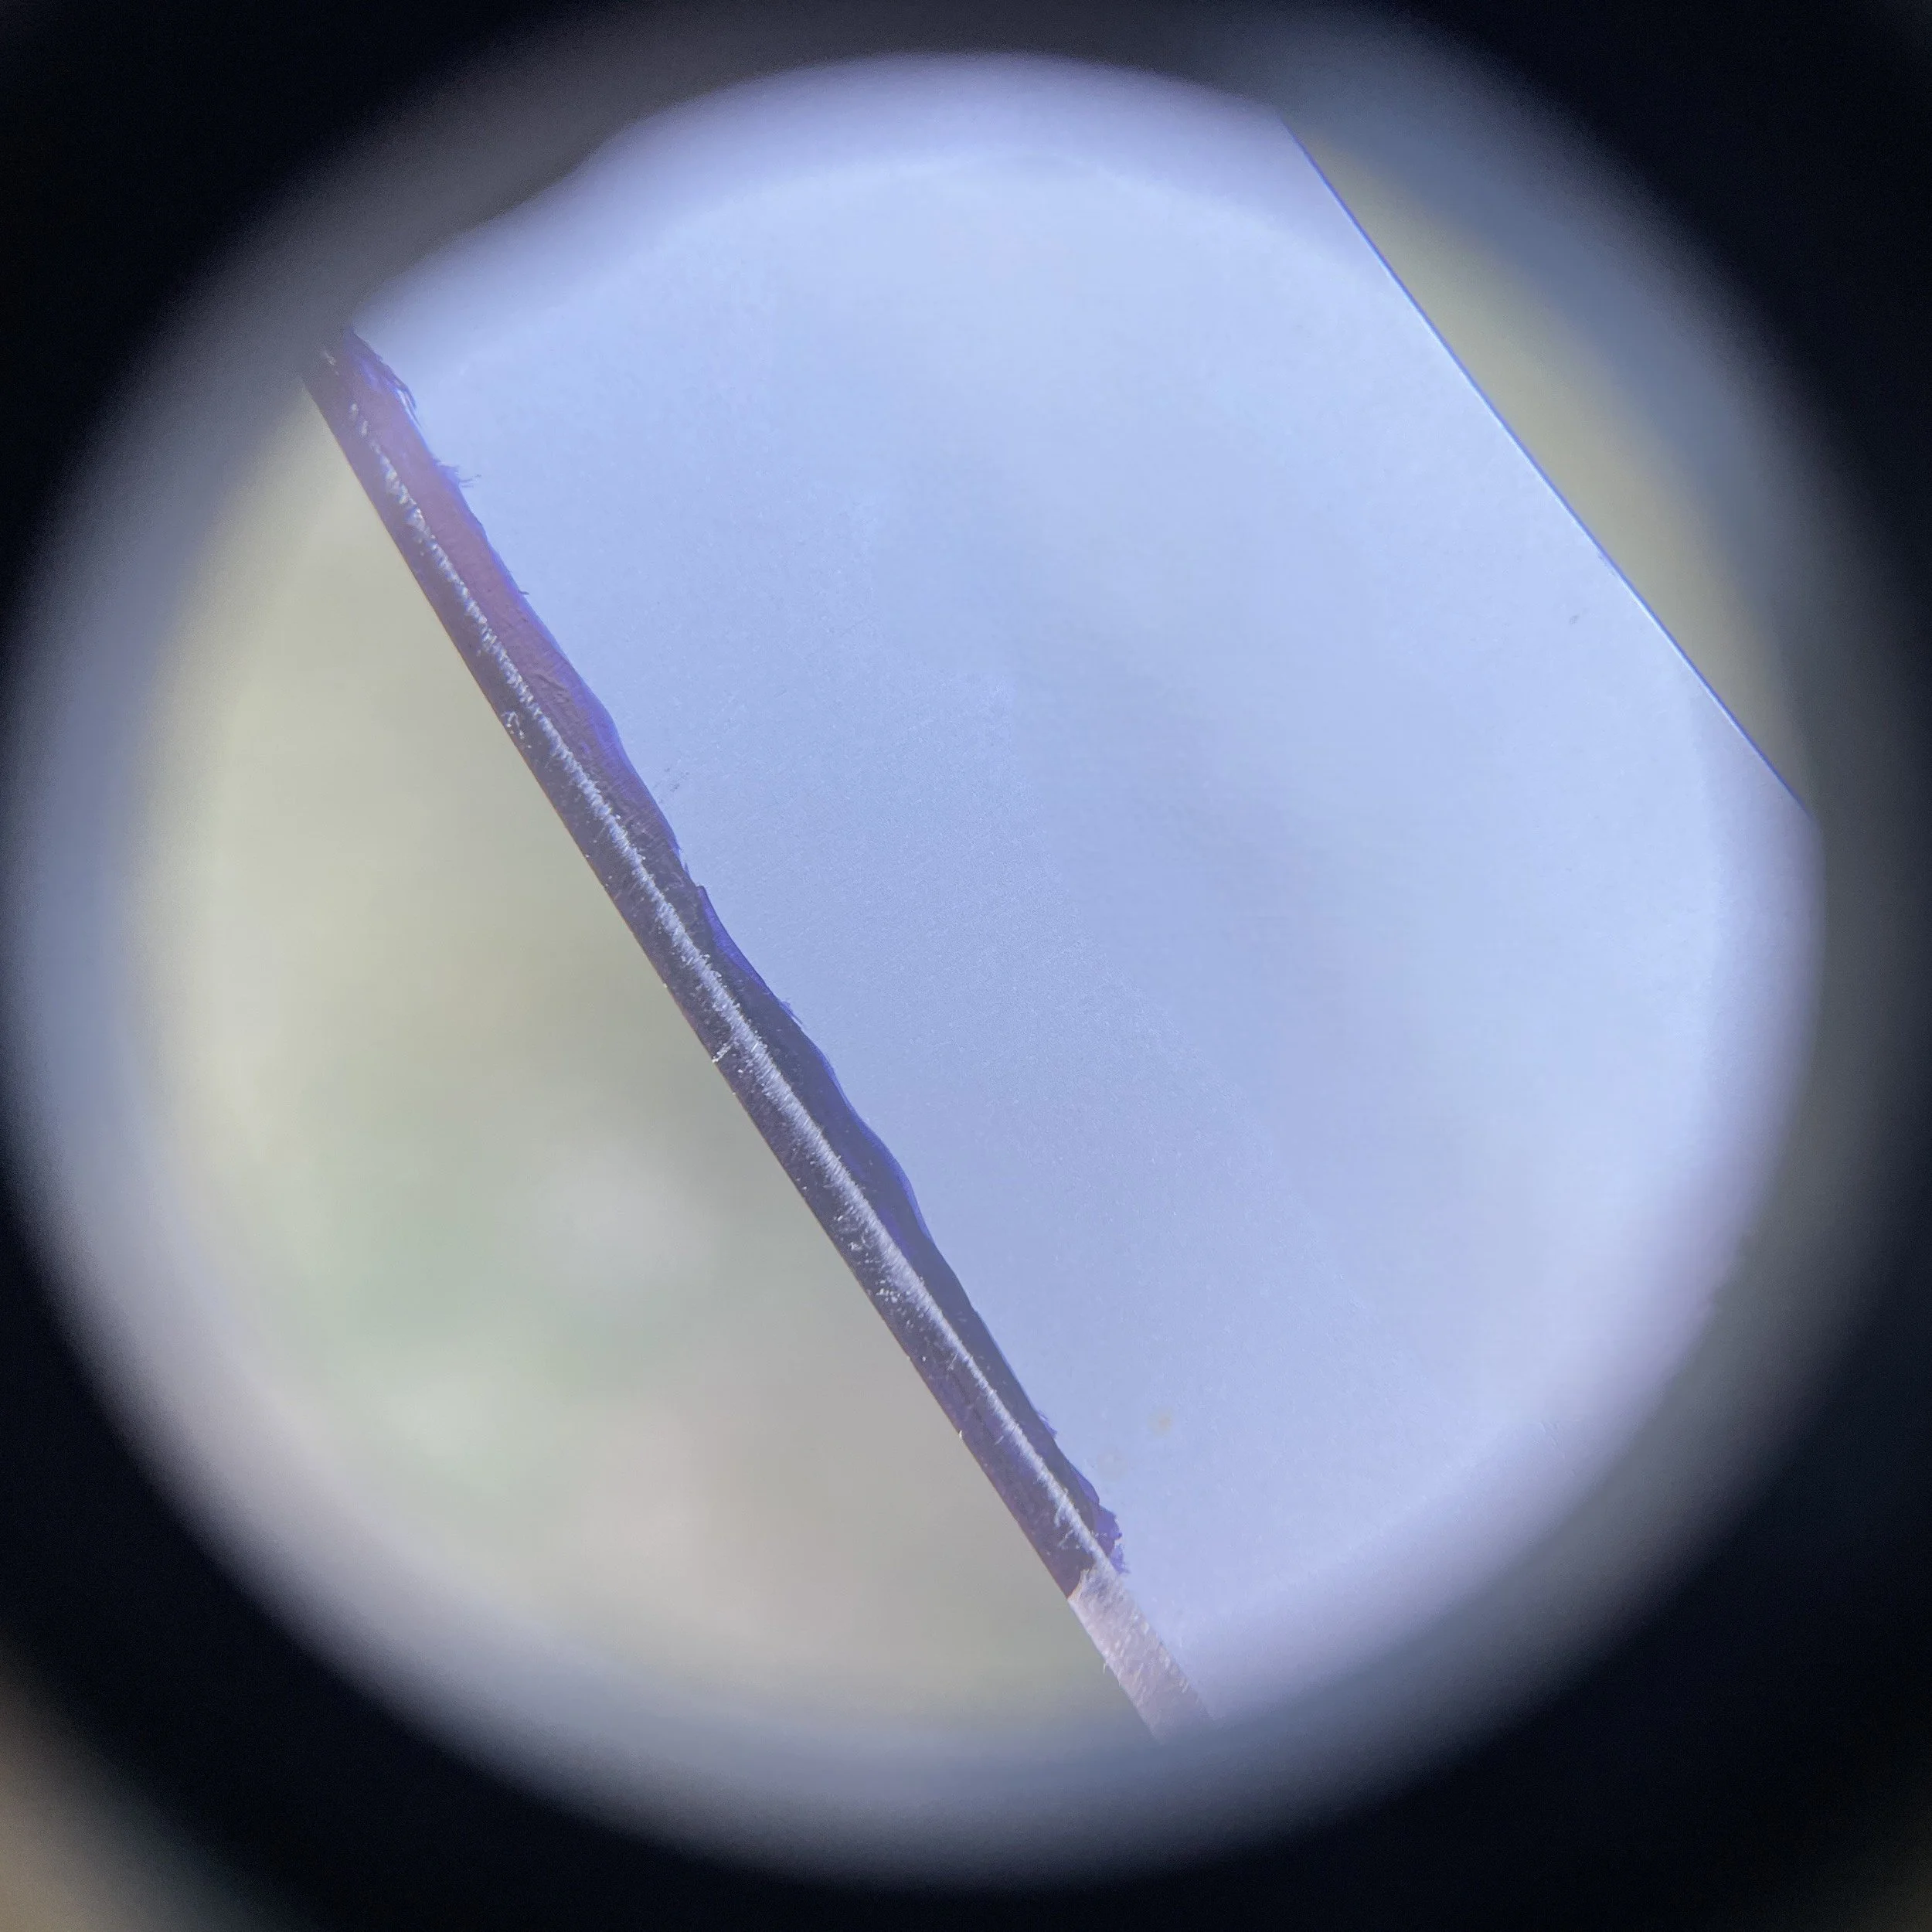
Under good light inspect the cutting edge with your naked eye or preferably with some magnification. You should observe that some portion of the mark on the cutting edge is worn off. The image above shows the blade after a single sharpening pass. Some of the marker has been removed but the marker at the very apex of the cutting edge remains untouched. The current sharpening angle of this blade is therefore greater than 10° but it is still unknown.
Note: All cutting edge images were taken with an i-phone through an inexpensive 10x jewelers loupe demonstrating the usefulness of this optional item.
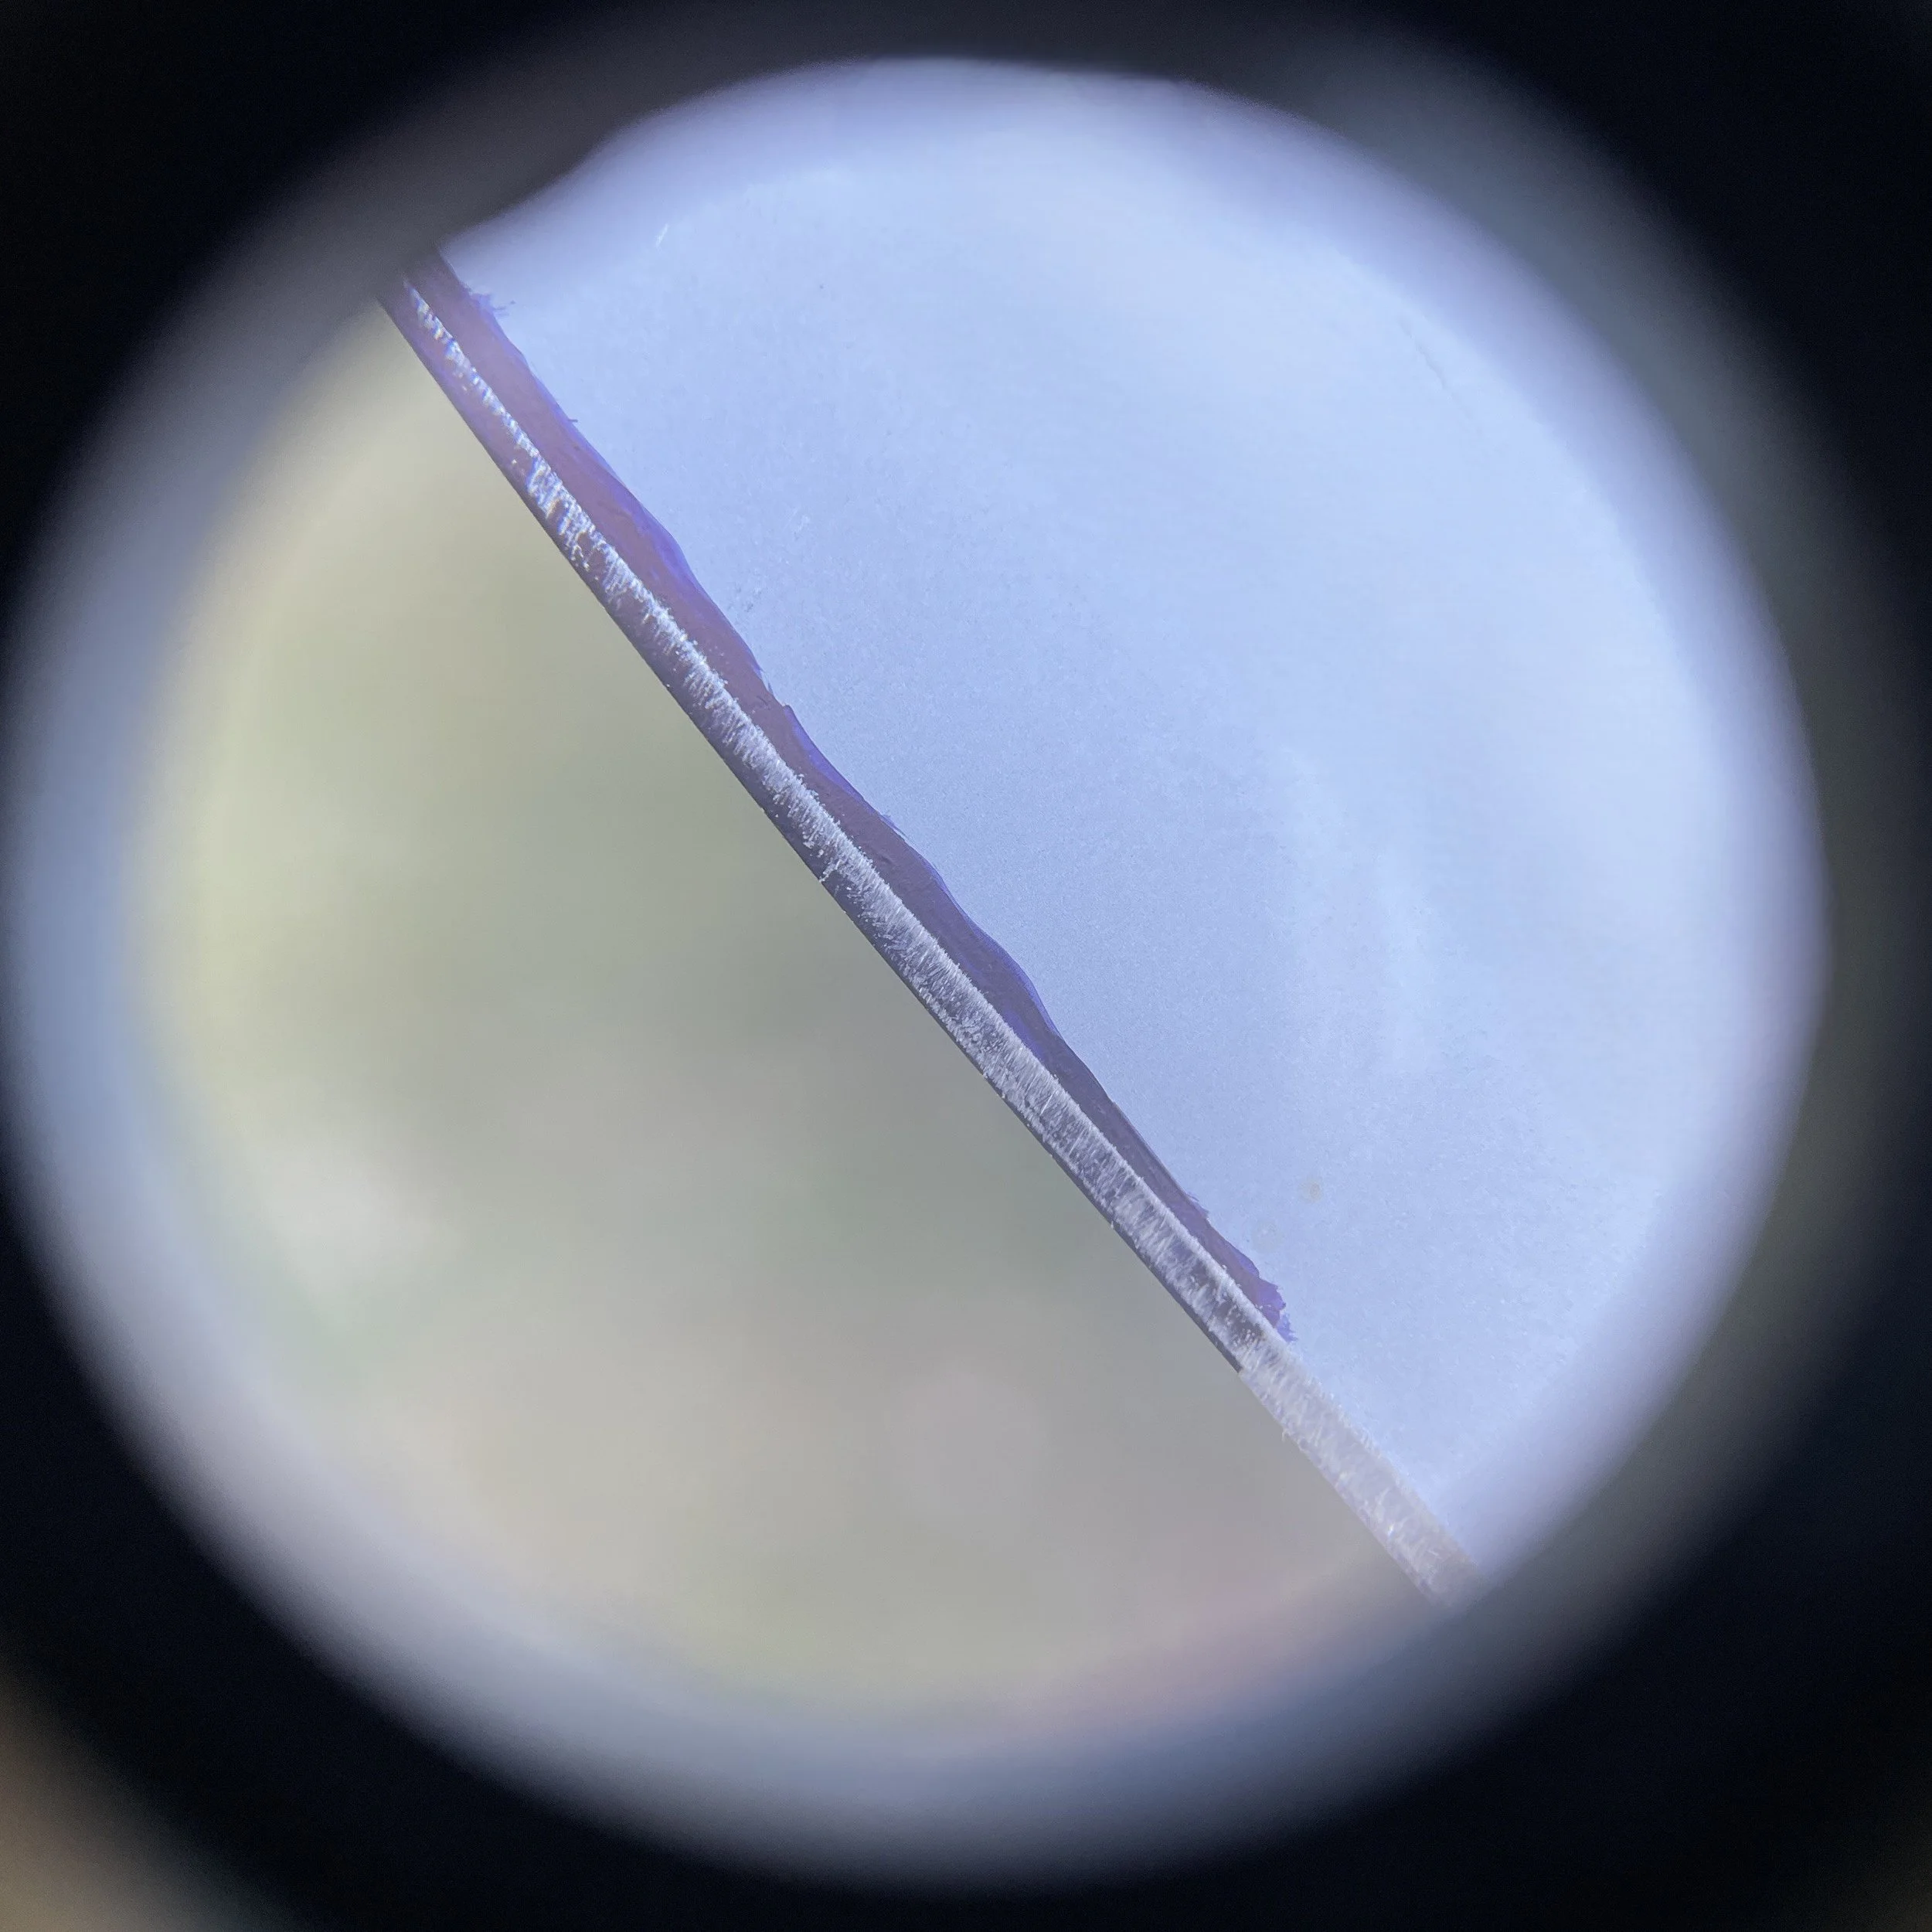
If some marker remains on the very apex of the cutting edge, proceed to add one additional penny to the stack. Based on the height of the blade in this example 4 pennies will result in an angle of about 13° as seen in the table. Align the mark on the spine with the top of the coin stack and take another single sharpening pass. Inspect the mark on the cutting edge again. You should observe that more of the mark towards the apex of the cutting edge has been removed. When the marker has been removed from the very apex of the cutting edge you have determined the current sharpening angle. The image above shows the blade after another single sharpening pass. More of the marker is removed but much still remains on the very apex of the cutting edge. The current sharpening angle of the blade is therefore greater than 13° but it is still unknown.
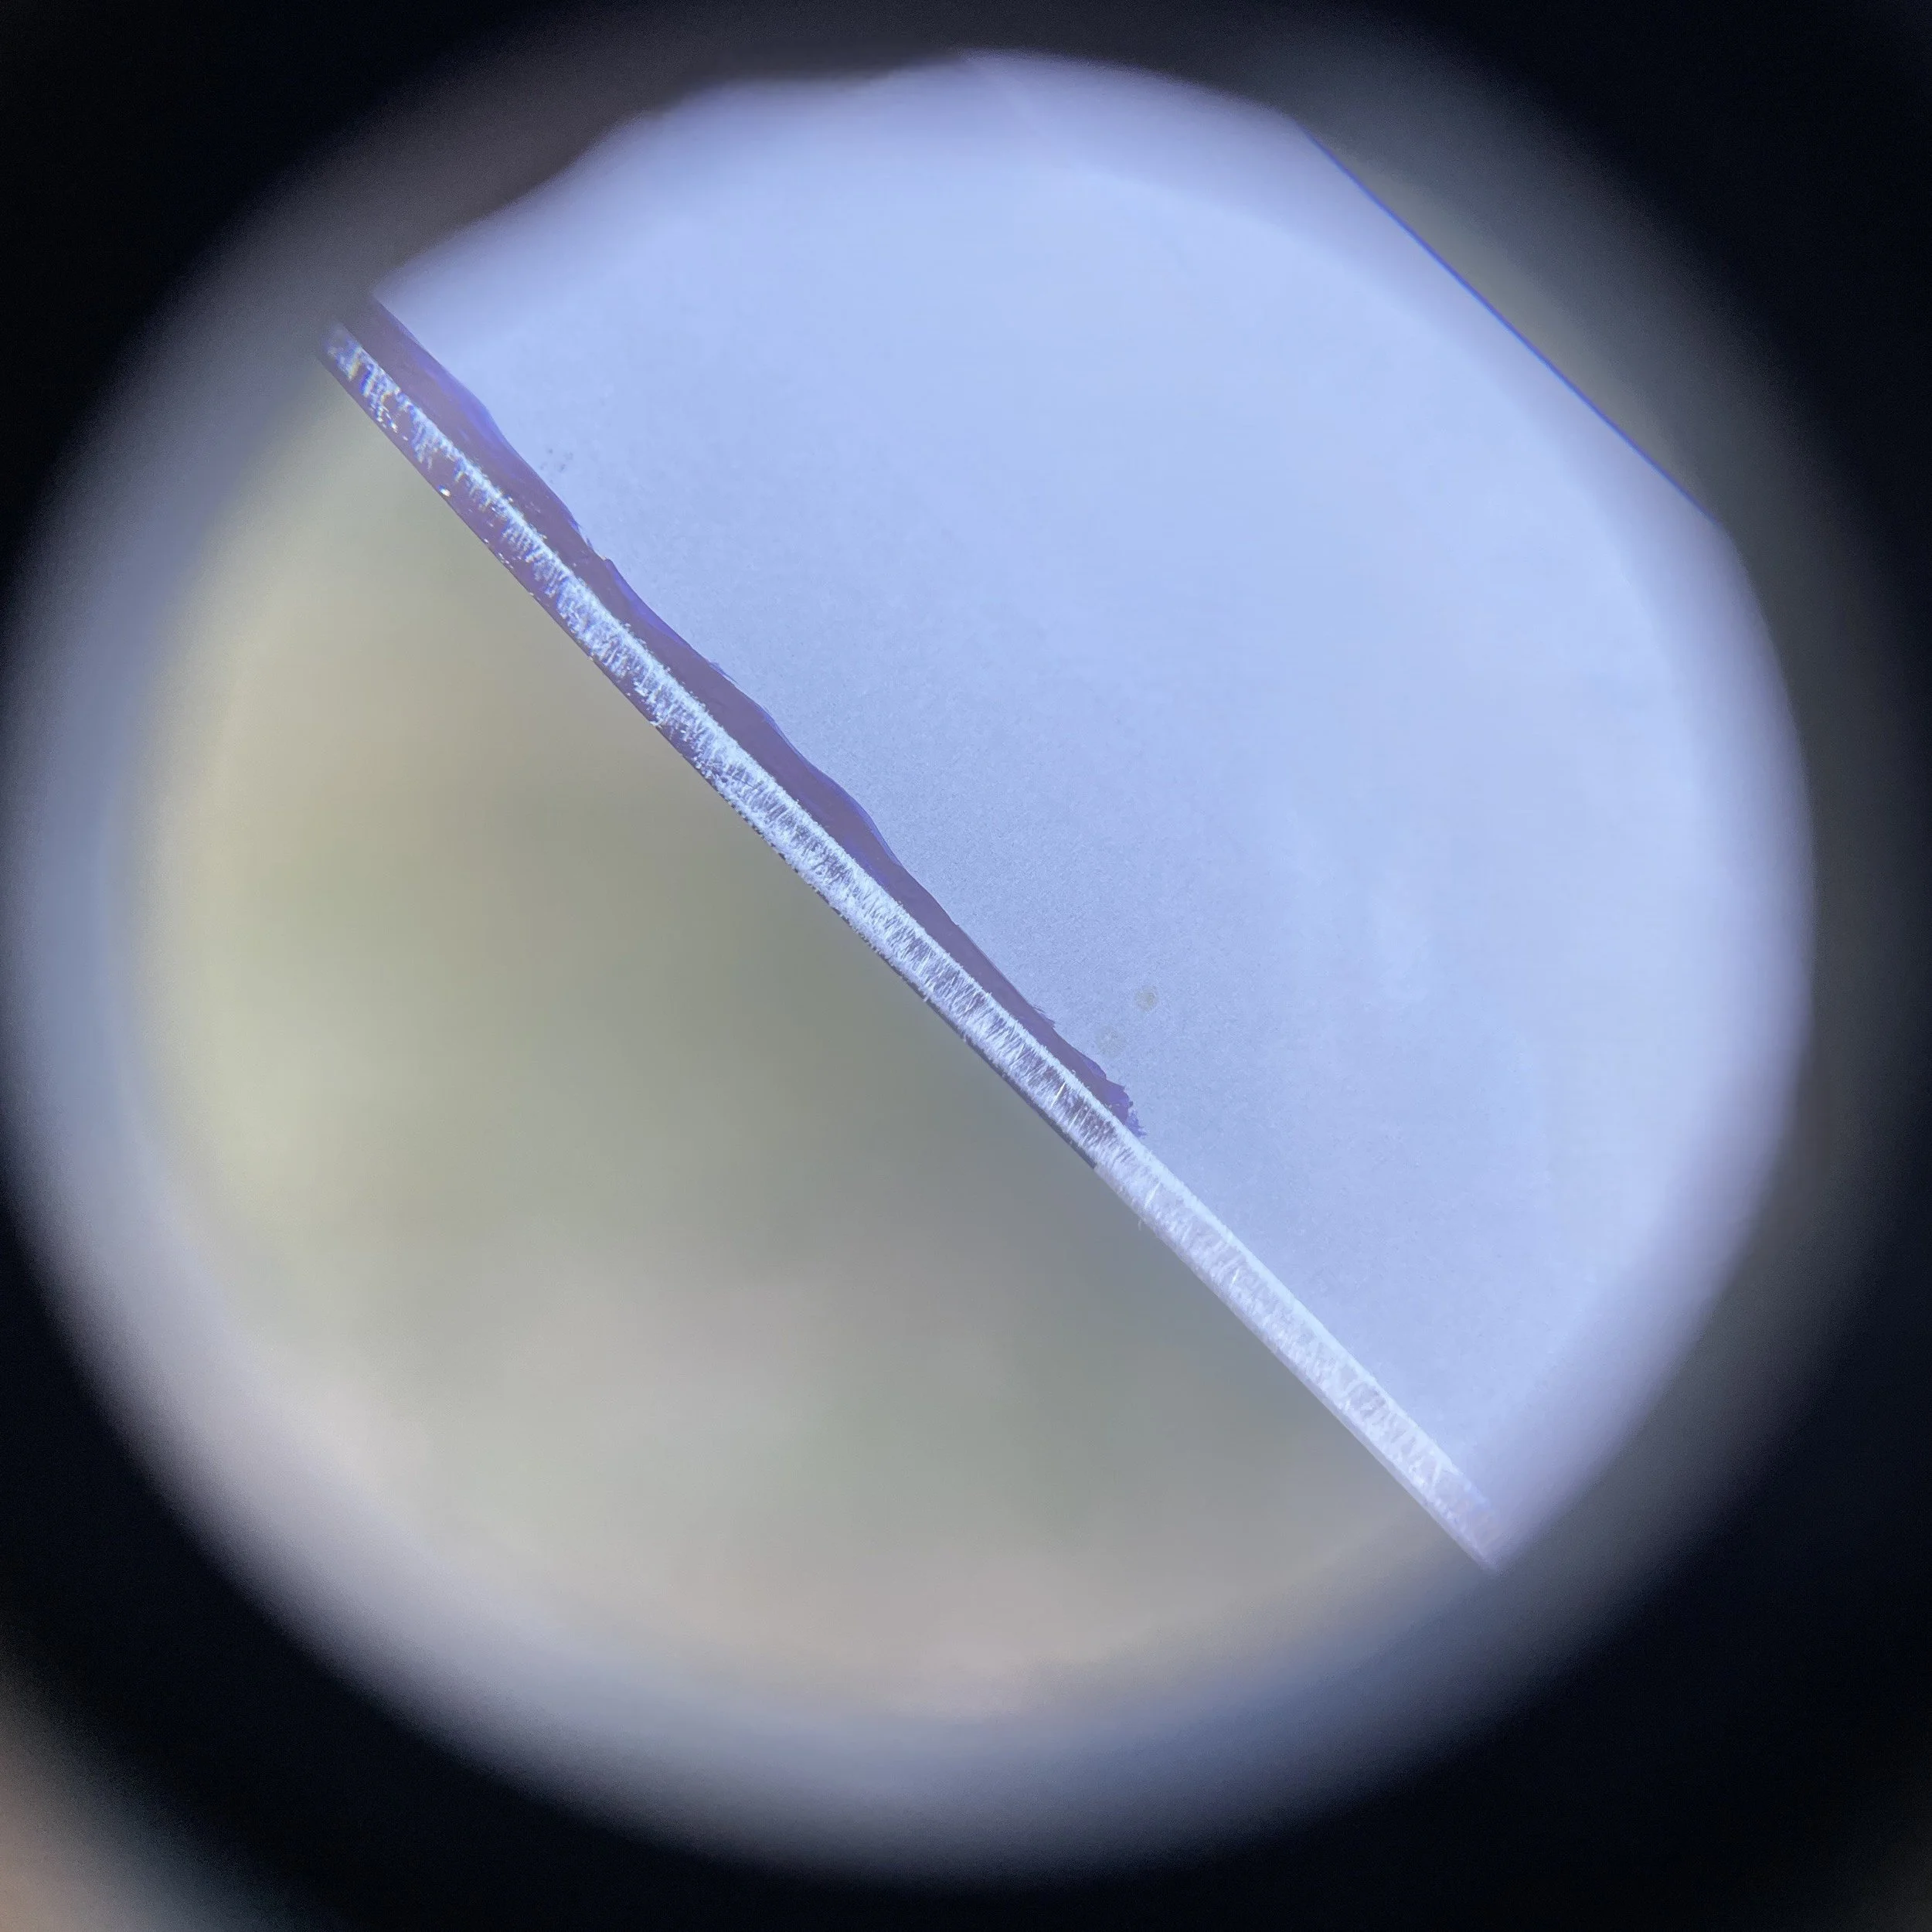
If some marker remains on the very apex of the cutting edge, proceed to add one additional penny to the stack. Based on the height of the blade in this example 5 pennies will result in an angle of about 17° as seen in the table. Align the mark on the spine with the top of the coin stack and take another single sharpening pass. Inspect the mark on the cutting edge again. You should observe that more of the mark towards the apex of the cutting edge has been removed. The image above shows the blade after another single sharpening pass. More of the marker is removed but some still remains on the very apex of the cutting edge. The current sharpening angle of the blade is therefore greater than 17° but it is still unknown.
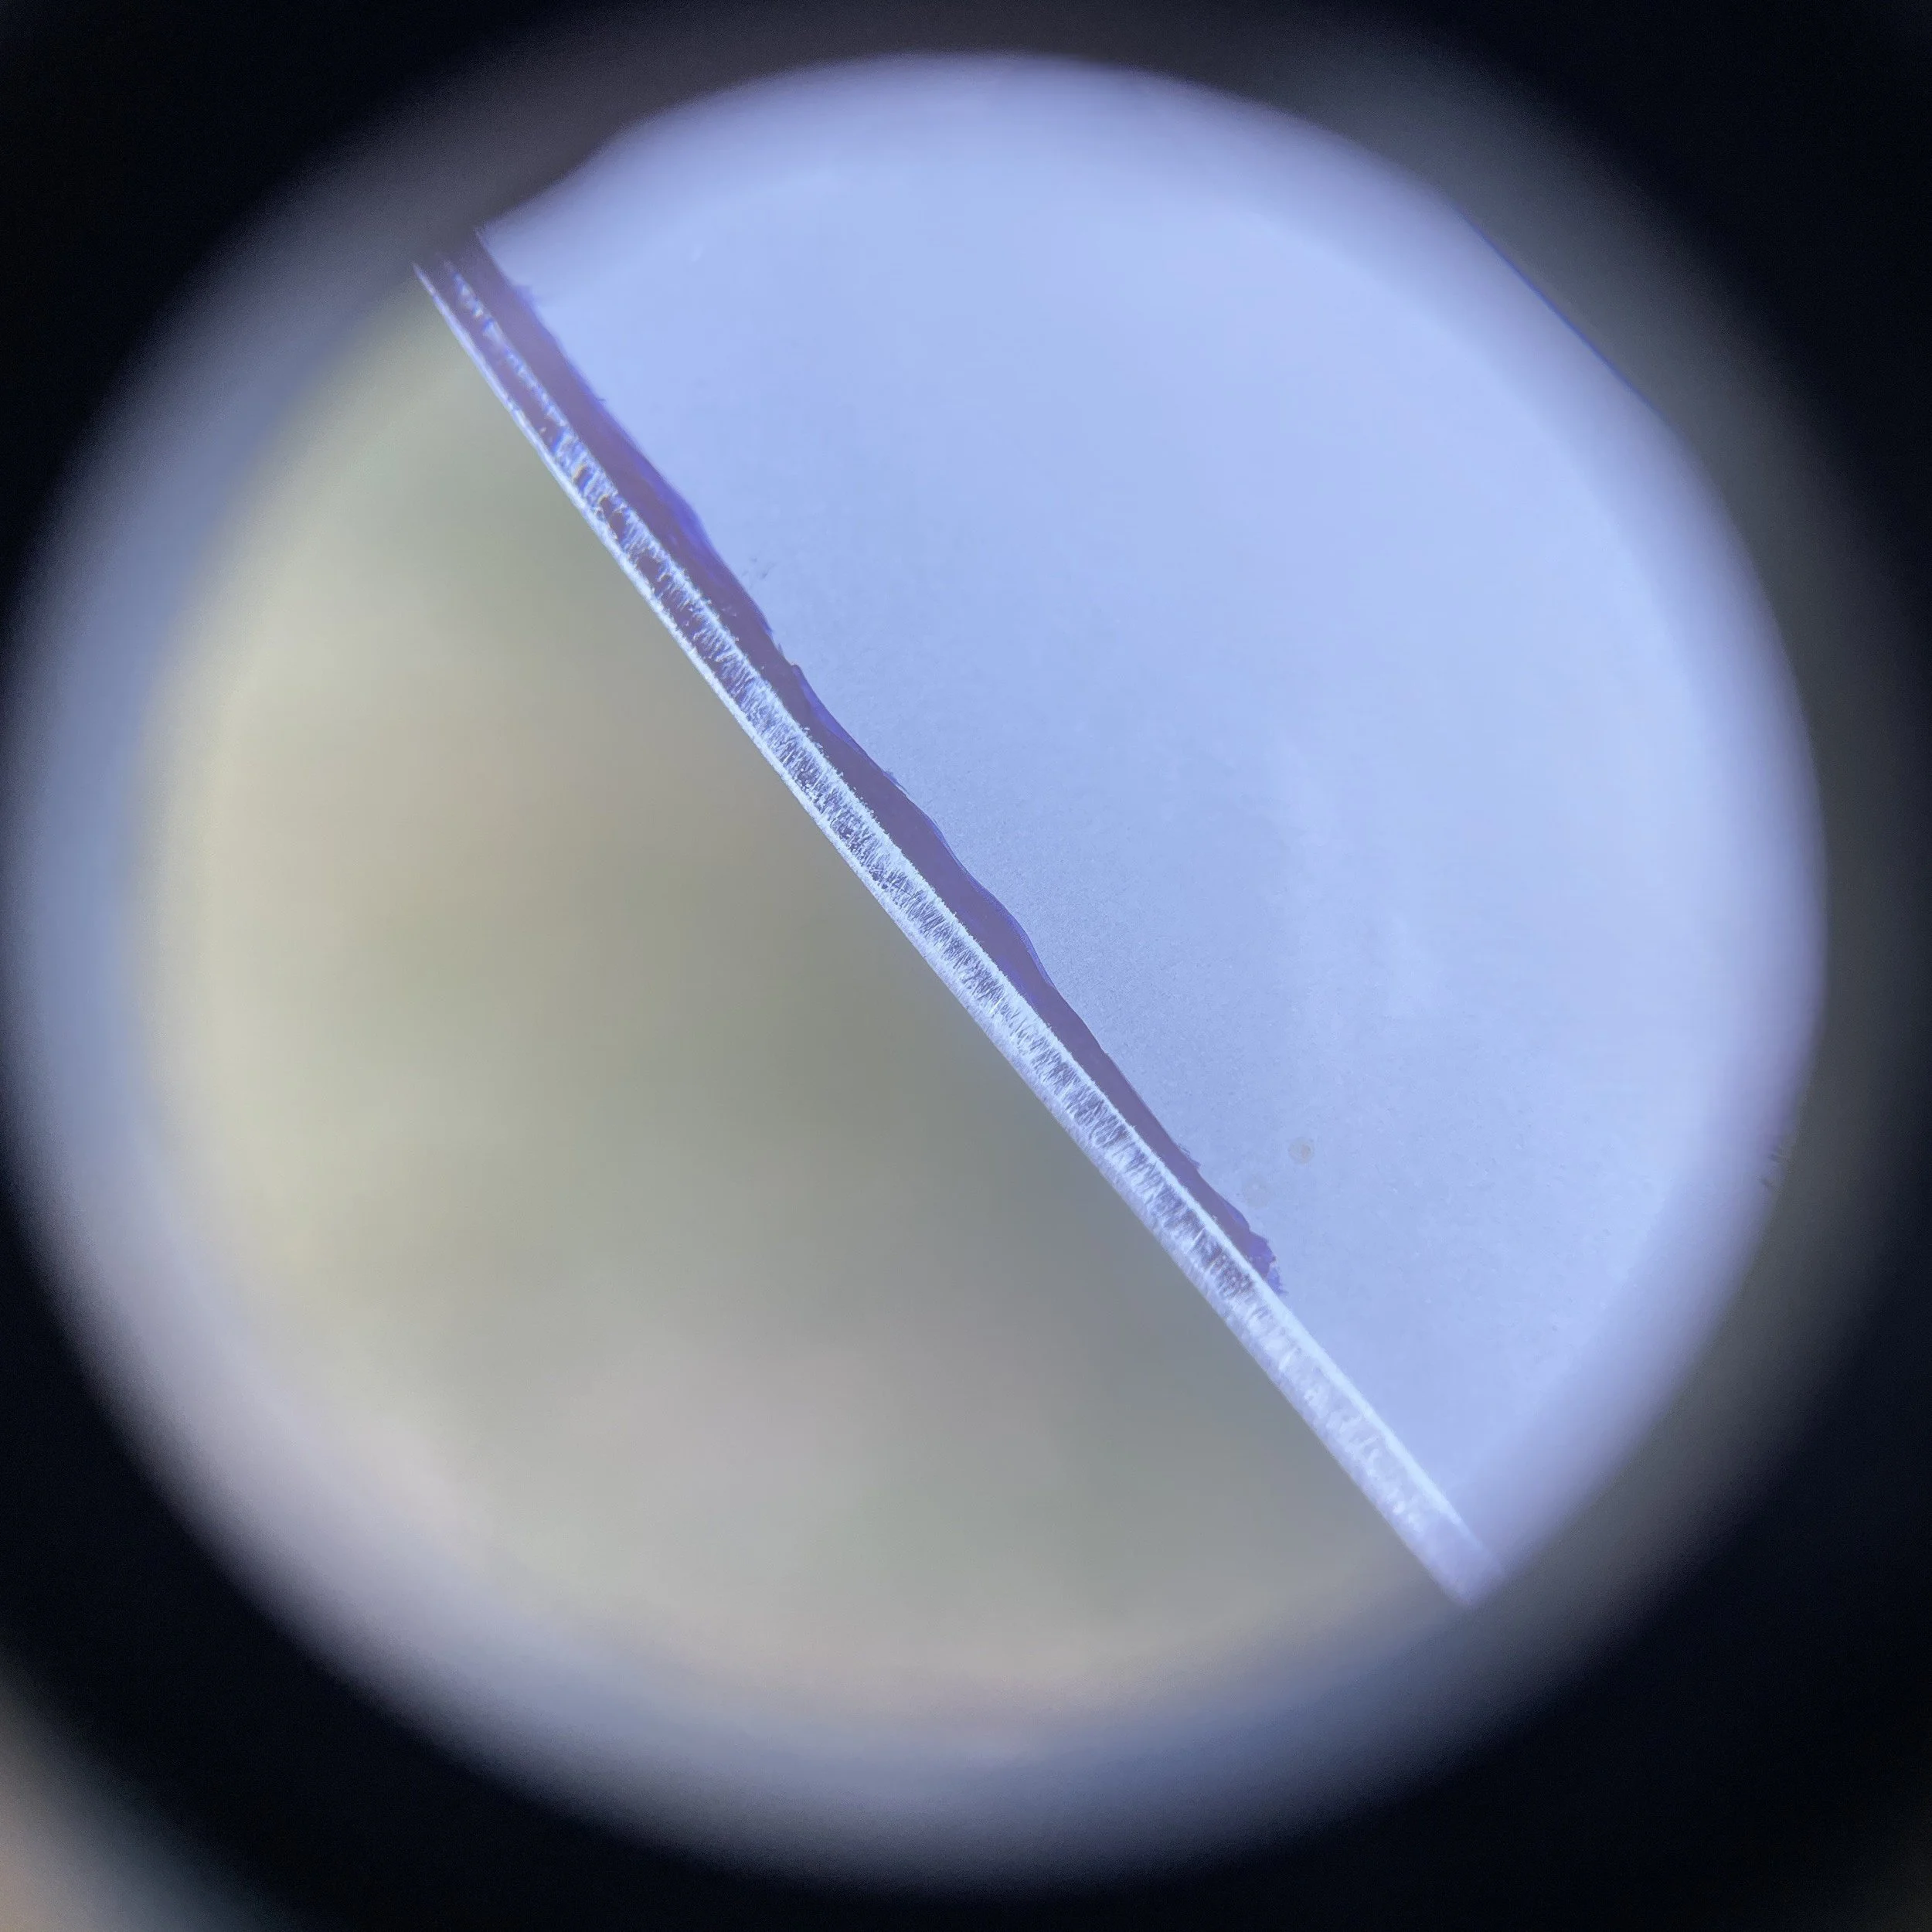
If some marker remains on the very apex of the cutting edge, proceed to add one additional penny to the stack. Based on the height of the blade in this example 6 pennies will result in an angle of 20° as seen in the table. Align the mark on the spine with the top of the coin stack and take another single sharpening pass. Inspect the mark on the cutting edge again. You should observe that more of the mark towards the apex of the cutting edge has been removed. The image above shows the blade after another single sharpening pass. The marker has now been removed from the very apex of the cutting edge. The current sharpening angle of the blade is therefore 20°. At this point you can stop working on this side of the blade and repeat the process on the other side of the blade starting again with the number of pennies corresponding to 10°. It is not uncommon to find that one side of a blade was previously sharpened to a completely different angle than the other side of the blade. This is your opportunity to correct it by resharpening both sides of the blade to the same desired angle using our Sharpening Angle to Coin Stack Table.
Instructions:
How to sharpen to a specific angle with a coin stack
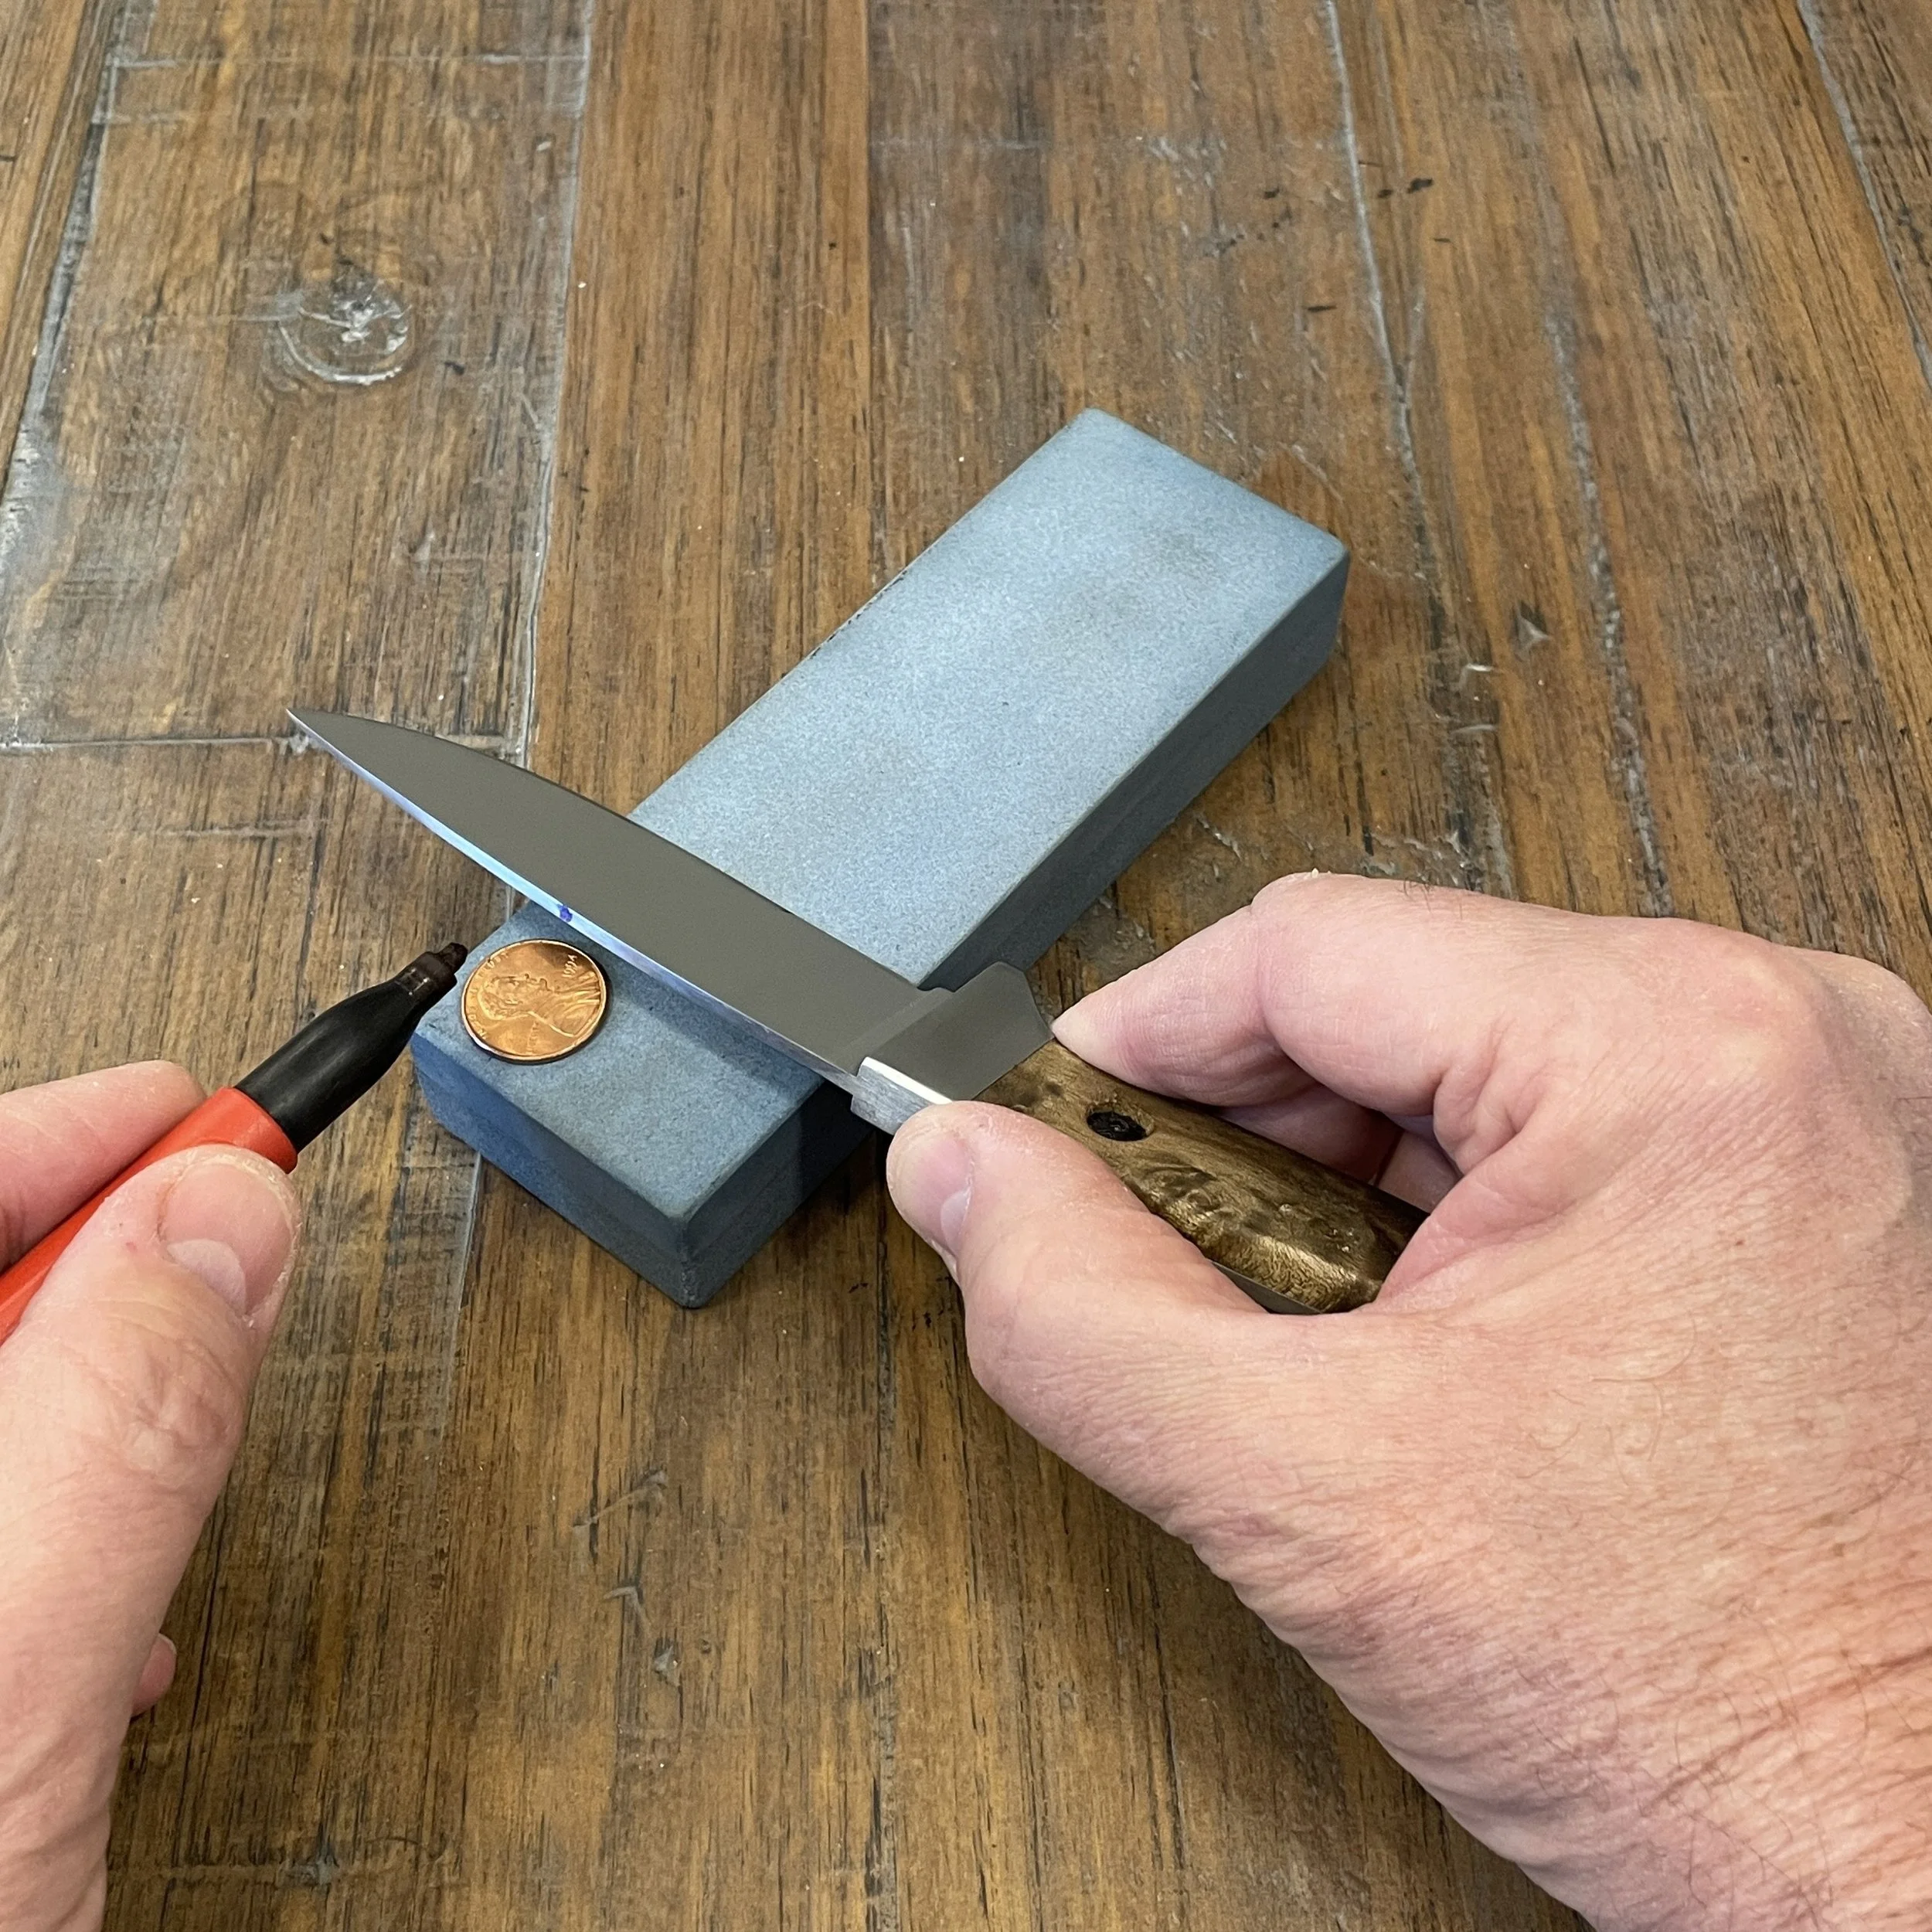
Gently lay your knife across the near end of the stone and place a penny on the near corner opposite the handle. With the permanent marker put a dot on the spine that aligns with the center of the penny.
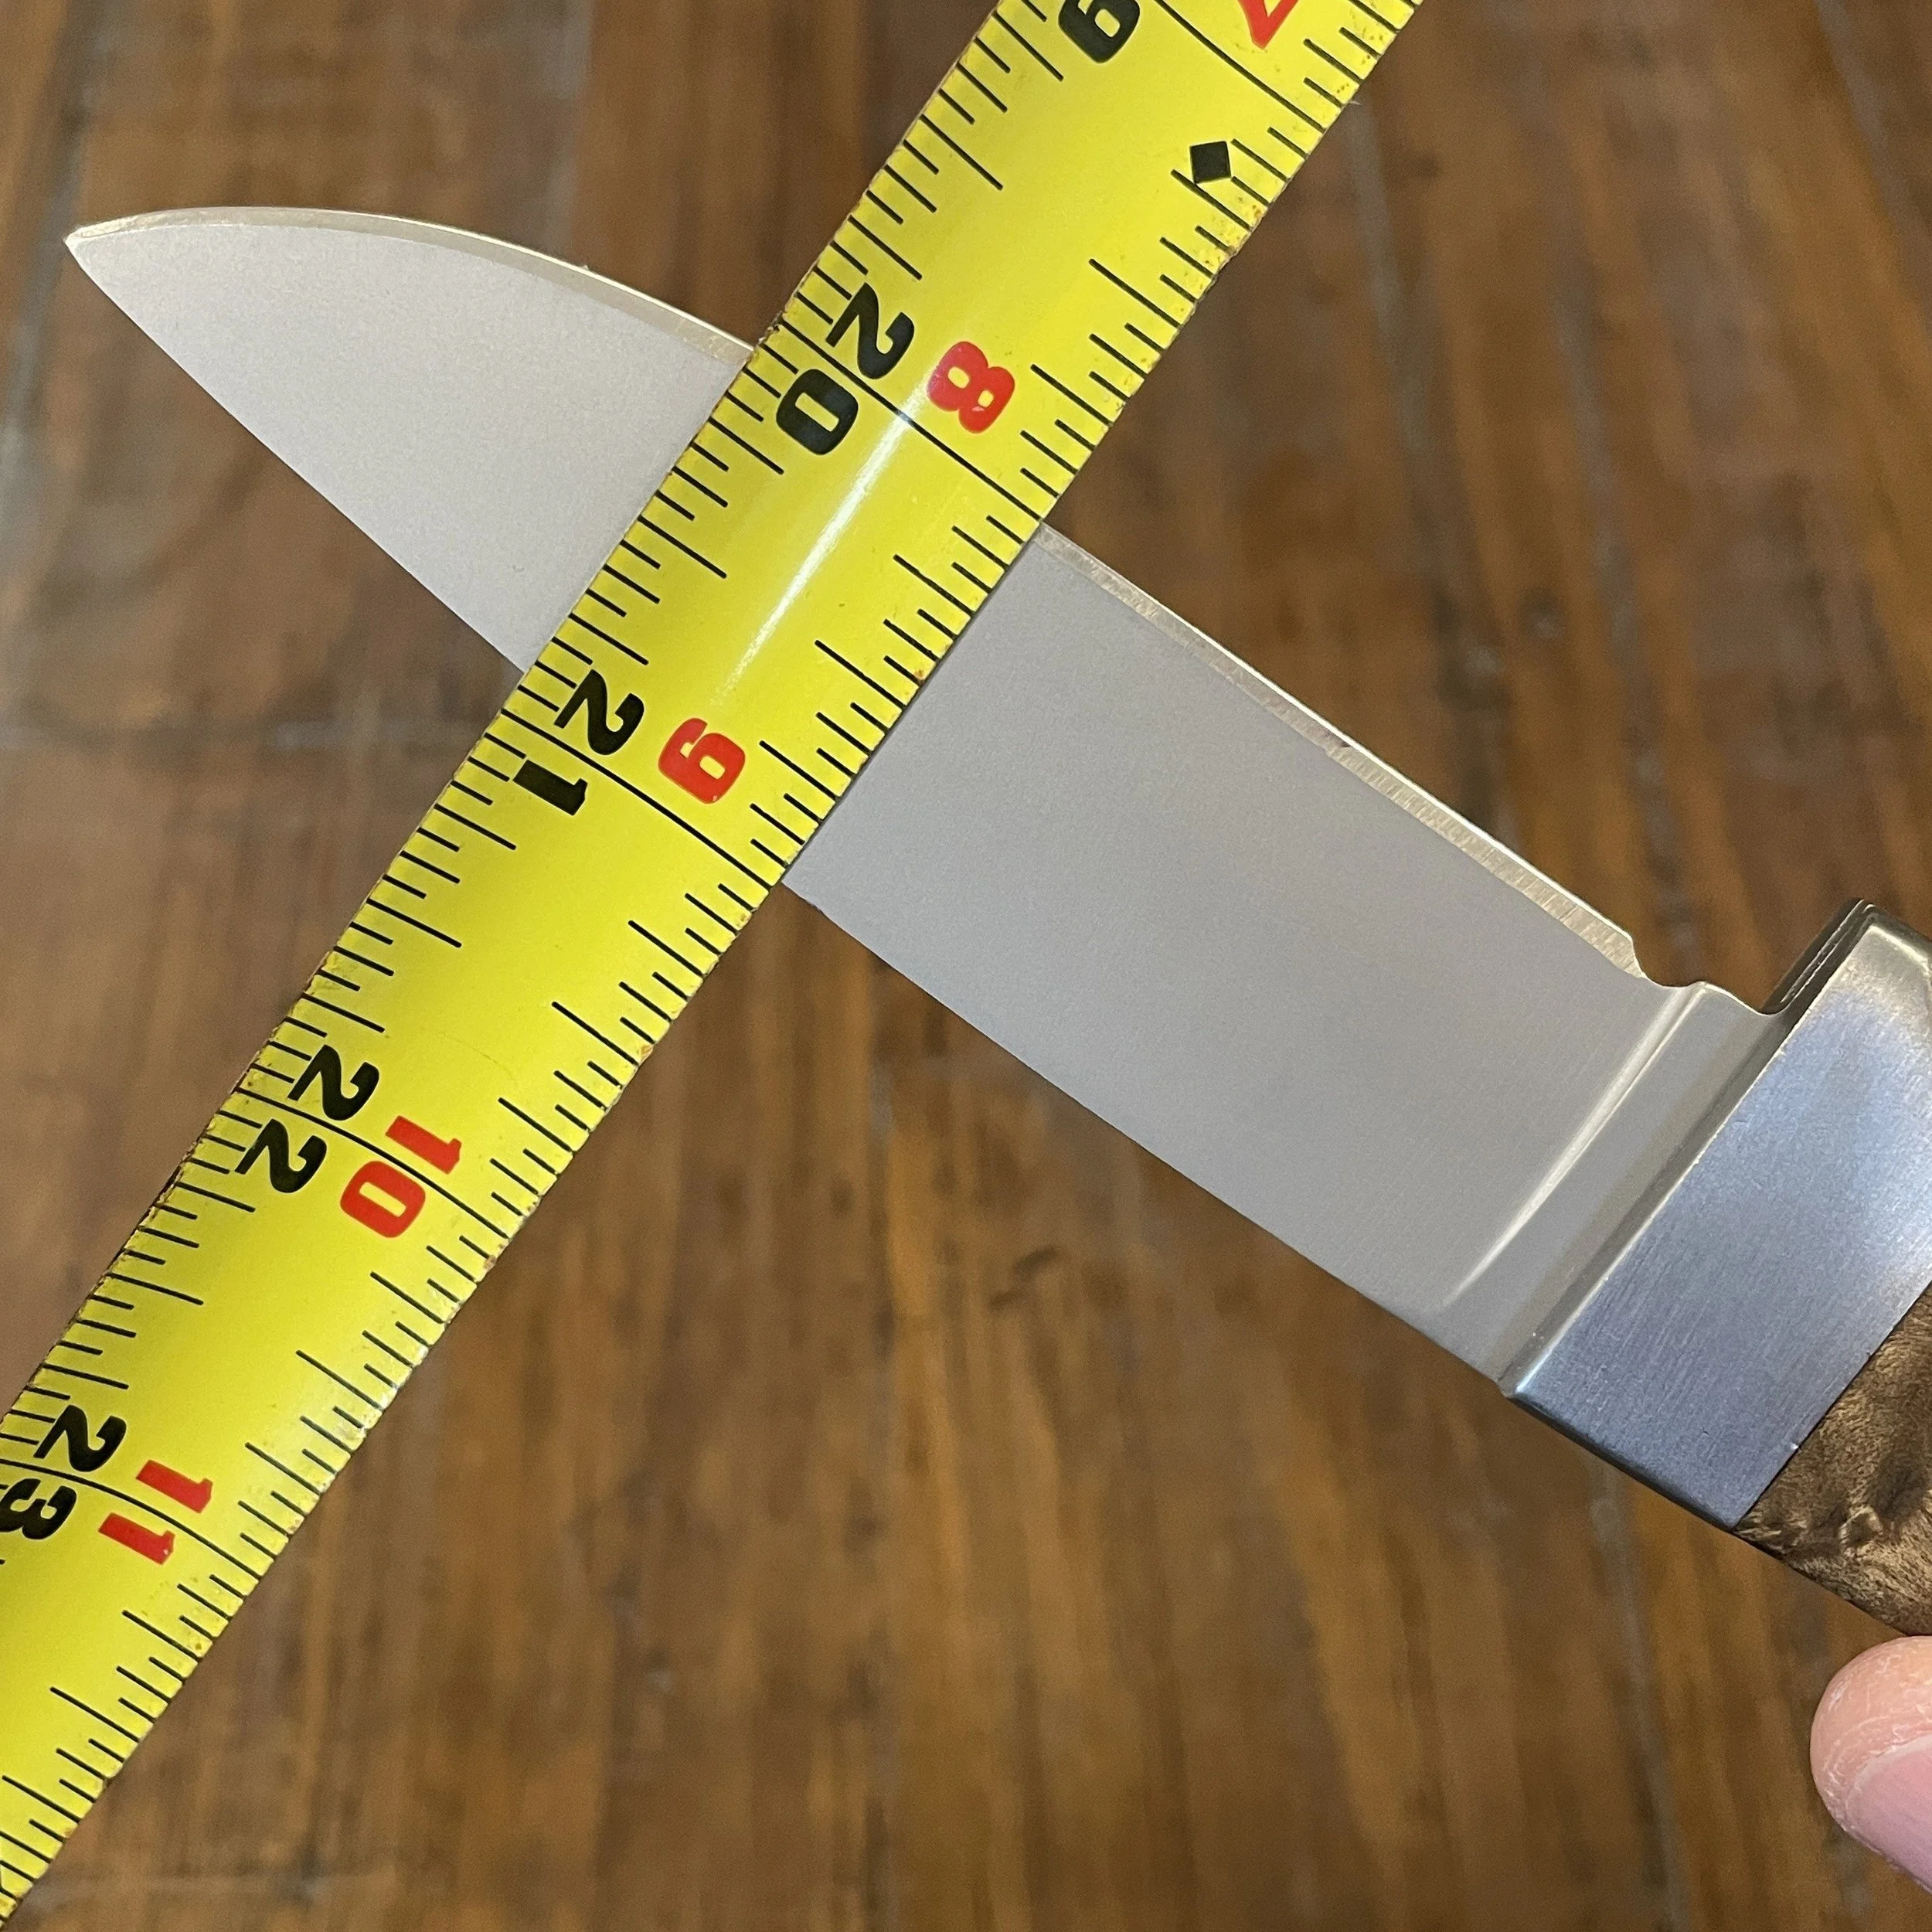
Measure the height (spine to cutting edge) of the blade at the point where you put the dot on the spine of the blade. In the image above the blade height is 1 inch.
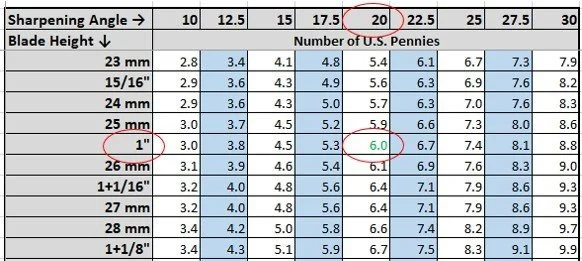
In the Sharpening Angle to Coin Stack Table locate your measured blade height in the left column and your desired sharpening angle in the top row. The intersection of the column and row provides the number of U.S. pennies in the stack to achieve the desired sharpening angle. In this particular example 6 pennies are required to achieve a sharpening angle of 20 dps.
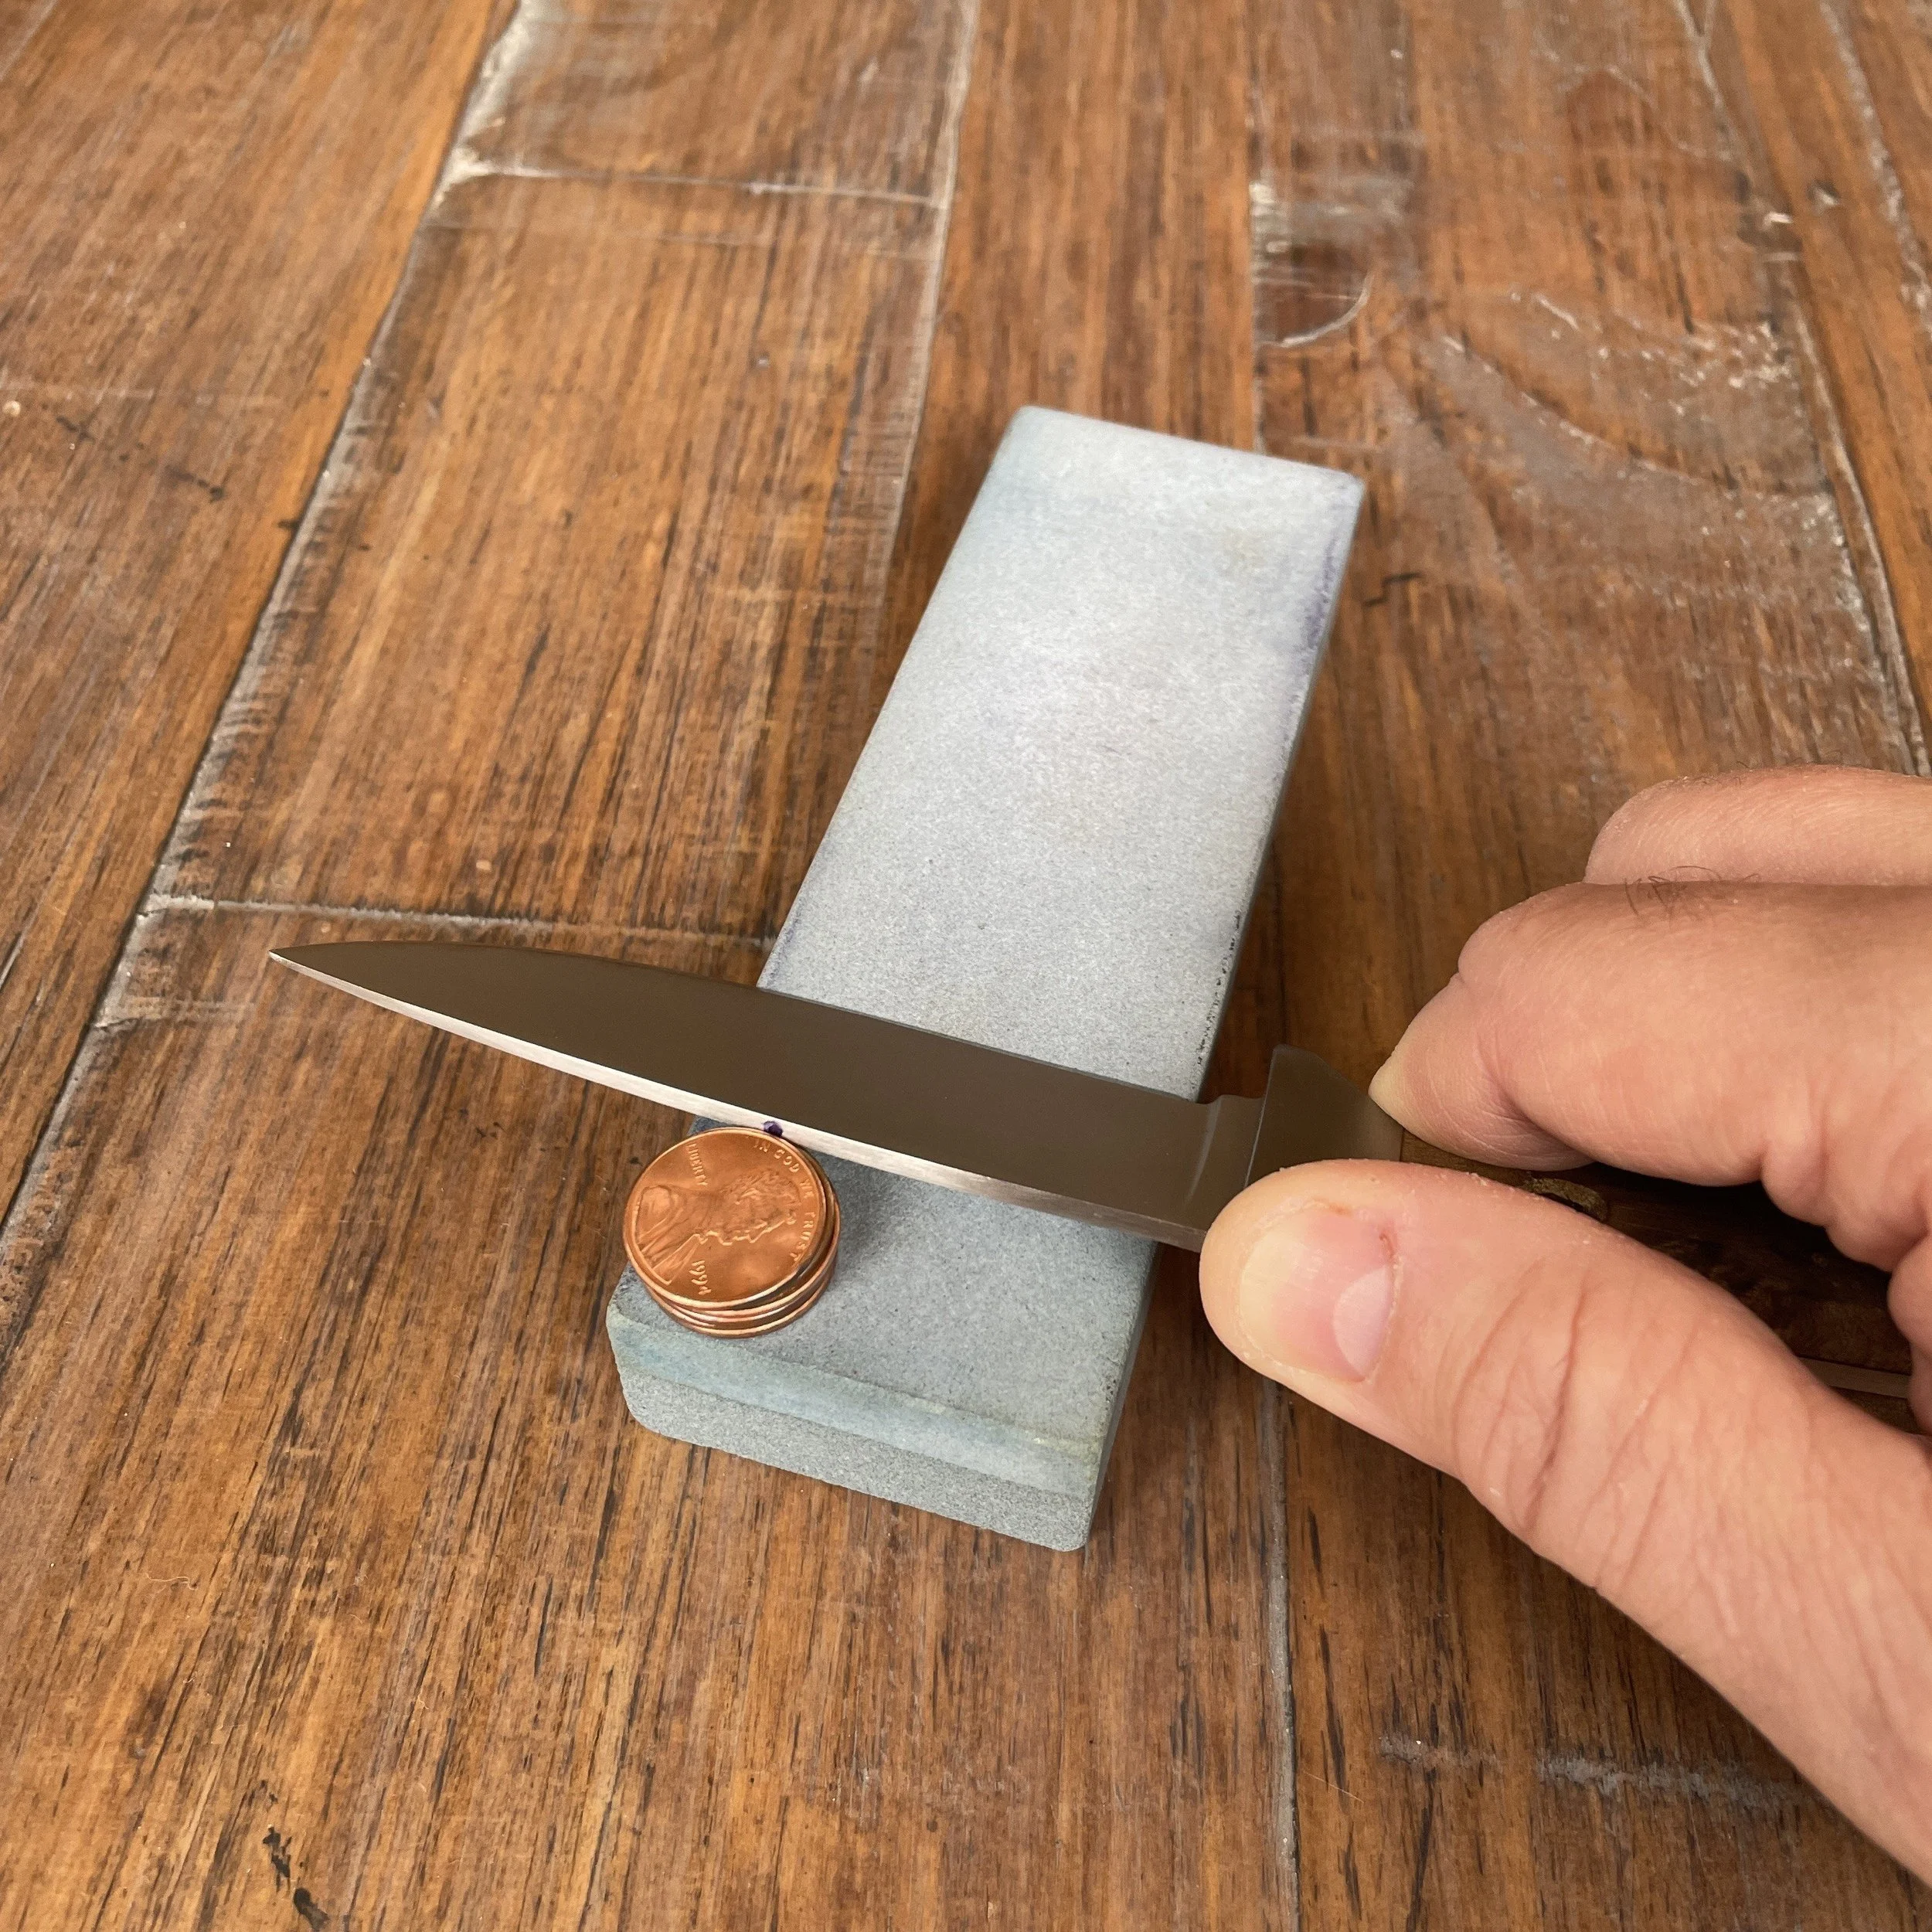
At this point add water or oil to your sharpening stone if required. Proceed to sharpen the blade by aligning the dot on the spine of the knife with the top of the coin stack and then take an arching sweep across the surface of the stone trying your best to maintain the starting angle of the blade relative to the stone. It should feel as if you are slicing a thin layer off the stone.
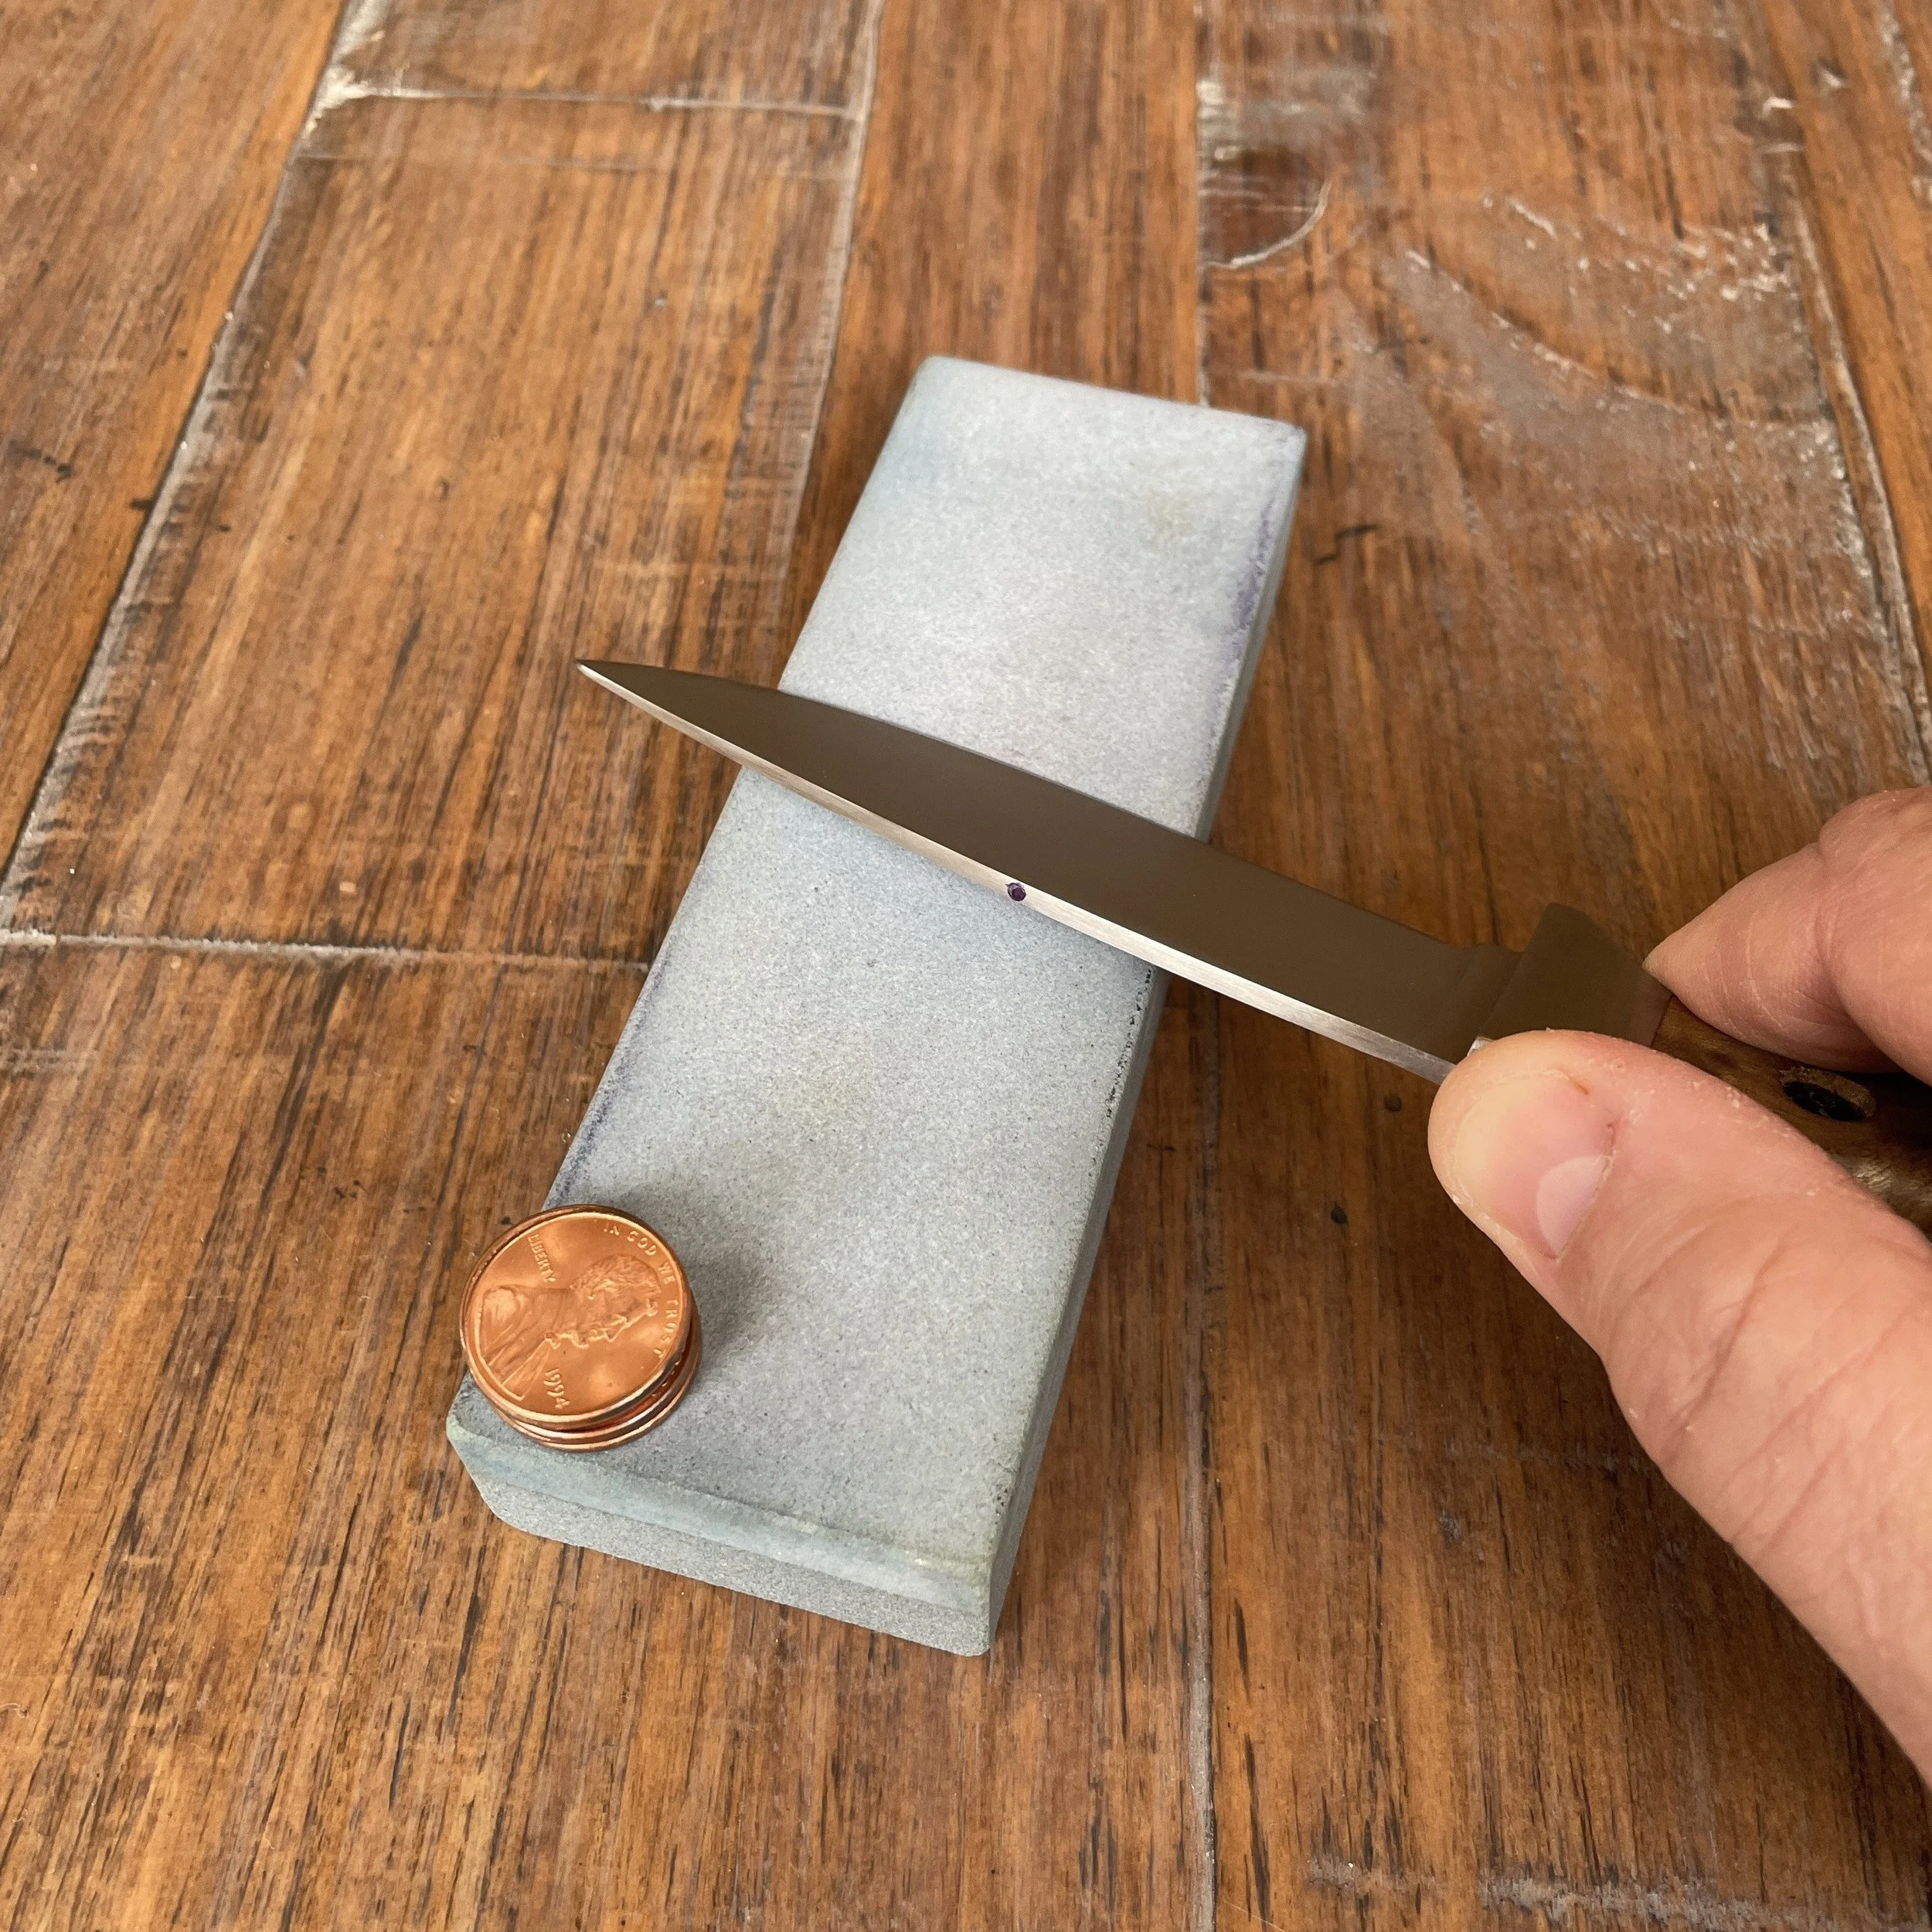
Repeat the alignment and arching sweeps across the stone ensuring that the entire cutting edge is coming in contact with the sharpening stone. Continue until a burr forms along the entire the opposite side of the blade. Count your sweeps and pause periodically to feel for the burr which is a fine barely visible curl of metal. Feel for the burr by running you finger gently over the cutting edge at various points on the cutting edge. You should feel the burr gently snagging on your finger tip. Do Not feel for the burr by running your finger along the cutting edge as this may result in a cut or little pieces of be burr sticking in your finger. Once you have established the burr along the entire cutting edge it is time to turn the knife over and sharpen the other side. To sharpen the other side move the coin stack to the other near corner. Turn the knife over and place in your opposite hand. Repeat the process on this side with a similar number of sweeps or strokes to ensure that the apex stays centered. A burr will form on the opposite side of the blade. After reaching roughly the same number of strokes, finish the sharpening with light alternating strokes (a single stroke on the left side then a single stroke on the right). This may be done with a finer grit sharpening stone. Repeat the alternating strokes until there is no sign of a burr on either side and the final level of sharpness is reached. If sharpening the opposite side of the blade with your opposite hand is awkward, you can put the coin stack on the far end of the stone. Turn the knife over and with the same hand align the dot on the spine with the top of the coin stack and carefully take sharpening sweeps towards you. Using a coin stack to position a blade and sharpen at a desired angle works with all types of sharpening stones and all types of sharpening techniques. The location of the coin stack may change though based on your preferred technique. Experiment and see what works for you.